"She looketh well to the ways of her household, and eateth not the bread of idleness." Proverbs 31:27

Friday, July 9, 2010

My First Handmade Apron


First I must confess that I am not very good at sewing, or at least my sewing machine is not very good at sewing!  The bobbin has a mind of it's own and does not like me at all!  We have a love/hate relationship going on!  I love having a sewing machine, but I hate it when my bobbin messes up!  I also  have never sewn anything without someone standing over me with their guidance.

I did sew this dress, but Chrystal had to guide me the whole way even though I did all of the sewing.  I cannot read a pattern - it is confusing - which is why I love the apron tutorials I find.  I made this dress for Revolution Day at church last year.  I am also wearing it tonight for an English Tea Baby Shower.  You may ask me why I'm wearing it tonight?  Because I spent a lot of time and money on this dress and I want to wear it more then once.  It is because of the baby shower I made my first apron - all by myself!


I did not have much money for a shower gift.  This will be Katherine's fourth baby, and we don't know if she will be having a boy or girl, so clothes were out.  She has three boys.  I had been flipping through an apron book a couple of weeks ago and saw an idea for an apron for the mom to wear when she gives the baby a bath.  Saturday I was at Target and saw this cute beach towel(don't you love the colors?), when I had the idea of making one of these aprons for Katherine.  The towel was seven feet long so I can get at least two aprons, and maybe three, out of it.  I found a great deal on the material for $1.68 a yard at Hobby Lobby and thought it went perfect!

I already had the pattern at home for an apron I have been wanting to make for myself.  So I folded the towel and made sure the hem of the towel would be the bottom of my apron.  Of course I can't make this guarantee on each apron cut from this fabric, but that is what will make each apron unique.  I laid my pattern on the towel, pinned it on, then cut it out.  Towel material frays very easily.

Trying to save as much material as possible, I cut the pocket out.  I love this pocket, it is huge - perfect for the baby shampoo, soap, lotion oil and whatever else you need it for!

I then sewed a zig zag stitch around the entire apron and pocket to keep the material from fraying.  I would not recommend skipping this step, it is quick and will save a lot of trouble later.  Remember the old saying "A stitch in time saves nine"?  It's true, especially in sewing!  I then sewed a hem around the entire thing.  Since I had zig zag stitched the apron, I did not hem where I would be sewing the binding on.  I did not want the material too thick there.


This is where the pattern got very confusing - on the binding/ties.  I dragged my pattern and material all the way to church and asked Skye for help - and forgot the directions!  LOL Basically it said to match it up at the arrows then cut one continuous circle.  It was way too confusing for me so instead

I cut it into three pieces and sewed it end to end.  I even sewed down the angles - which was a mistake!  LOL it would have made a nice frame though!  I cut the angle off then folded my ends to the center and pressed them, then folded it in half and pressed it together.

Make sure it is perfectly even and straight!  This s also the binding, not just the ties.  I re-enforced the ties at the bottom with a "trianglesh" shape on each end.  This is another step you do not want to skip or the ties might pull out.  I double stitched across the binding at the top also for re-enforcement.

I made a wash cloth out of the towel material also.  I made a loop with leftover material, it looks kind of like a ribbon shape.  I made sure it was a good size for the button so that I could attach it to the apron.  I sewed it onto the back of the wash cloth.  Make sure to re-enforce the stitching here also.  If I had thought of the wash cloth sooner, I would have found a really cute, big button to sew on.

Here is a time saver tip I learned when I worked for a dry cleaners.  You double the thread before threading your needle to make four strands when you sew on buttons.  It saves time.  Make sure the button is sewed on tight and at a convenient spot for the wash cloth.

This apron was a lot of fun to make, and I will definitely be making more!!  Here's a question for you - would you rather buy a full-length apron or a waist length apron?
Missy

Wednesday, July 7, 2010

I did it! Crocheted Dish Soap Apron

Okay, I have been asked several times why I would want to crochet an apron for my dish soap bottle? My answer is why not? :) It's small, cute, quick, and a great learning tool!


I saw these cute aprons (I posted the directions on my tutorial page)and decided I needed one! So I went digging around in my yarns and found some yellow yarn! As you can tell from my tablecloth, my kitchen is green and yellow. Now, you have to know that I have not crocheted since I was 18, that was 18 years ago! I had only learned how to crochet the most basic stitches to make pot holders. I needed to learn how to crochet, so I took my yarn and my crochet hook and cornered Miss Debra at church.


Every church has a Miss Debra, she is everybody's mom and she is the one who teaches you how to cook and crochet! "The aged women likewise, that they be in behaviour as becometh holiness, not false accusers, not given to much wine, teachers of good things;" Titus 2:3 She also teaches us how to be a better Christian, wife and mother. Everybody loves Miss Debra and appreciates the wisdom she gives us!


Even though I made all kinds of mistakes that she had to correct and asked the same questions over and over again, she was very patient with me! I have started making another one and maybe by the time I get through this one I'll be able to make one by myself! I must admit that I am very proud of myself for actually finishing a project! My basket is full of a lot of unfinished projects! LOL! The next apron should look a lot better! I hope!


So let's go make an apron!
Missy


Tuesday, July 6, 2010

Buttermilk Layer Cake for Independence Day


I hope everyone had a great Independence Day!  I spent mine at church and heard two excellent sermons on how God can make you free.
My husband bought me an airbrush on Ebay a couple of months ago, but since I was planning my baby shower I had not had time to practice with it.  I thought a flag cake would be a lot of fun!  It looks kind of tie dyed doesn't it?  I still need a lot of practice, but it was a lot of fun, and my husband was having to help me a lot! 

First let me tell you about the cake I made.  I found this great new cookbook Bob's Red Mill Baking Book by John Ettinger.  My loving husband went online and found me a great deal on it.  You can get the book from their website  http://www.bobsredmill.com/bobs-red-mill-baking-book.html  or go to Amazon.com . Sometimes I want to try a new cake using whole wheat pastry flour, and what better place to get a recipe then from the company that puts the flour out?  I found a great recipe for buttermilk layer cake, it was delicious but kind of crumbly.  Here is the recipe:


Buttermilk Layer Cake
Makes two 9-inch layers or one 10-inch

*  2 1/2 cups sifted whole wheat pastry flour
*  2 teaspoons baking powder
*  1/2 teaspoon baking soda
*  1/4 teaspoon salt
*  13 tablespoons unsalted butter, softened
*  1 1/4 cups sugar (I used palm sugar)
*  3 eggs, separated
*  1 teaspoon vanilla extract (not imitation)
*  1 cup plus 1 tablespoon buttermilk


I had doubled my recipe, and I only had one cup of buttermilk left, so I had to make the other half with soured milk.  To make soured milk you can use either white vinegar or lemon juice.  I took one tablespoon of lemon juice and put it into my measuring cup and added my organic milk to the cup to make one cup of liquid.  Make sure you use a liquid measuring cup for liquids and a dry measuring cup for dry ingredients or your measurements will be off.

There is a difference between whole wheat pastry flour and whole wheat flour.  I always use organic flour.  The flour on the right is whole wheat pastry flour and is a lighter flour and does not have as much gluten.  It makes a lighter cake then regular whole wheat which is on the right.  Never use whole wheat pastry flour for bread making because there is not enough gluten.  You can use whole wheat flour for this cake, but it will have more of a cornbread consistency.

If you do a lot of baking, make sure you invest in a good sifter, especially if you use wheat flour.  You put all of the dry ingredients in the sifter and sift them together.  Whole wheat flour will have granules left in your sifter, THROW THESE AWAY, do not add them to your batter if you want a fluffy cake!  Okay, now on to the directions for the cake!  :)

Make sure all of your ingredients are at room temperature.  (Just pull everything out before you get started, this also helps to make sure you have all of your ingredients).  Preheat the oven to 350 degrees.  Grease or line your pans with parchment paper.
(I always use three bowls to separate my eggs. The middle bowl I pour my whites into from the egg shell, and then pour the yolks into the left, and pour the whites out of the clear bowl into the bowl on the right. This is in case a yolk breaks, I don't have to pour my whites out and start over. I throw the shells into a bowl for my husband to give to our wild birds outside.)  In a large bowl, sift or whisk together the flour, baking powder, baking soda, and salt.  Cream the butter with the sugar until light, about 4 minutes, scraping down the sides of the bowl as necessary.  Beat in the egg yolks and vanilla.  

Beat the egg whites until stiff and set aside.  (do you notice how the egg whites can stand on it's own?)  Add a third of the flour mixture to the butter mixture, just to blend, then add half the buttermilk.  Repeat with another third of the flour, the rest of the buttermilk, and then the rest of the flour.  Gently fold in the egg whites.  (DO NOT OVER MIX YOUR CAKE BATTER OR IT WILL BE TOUGH!)

Pour the batter into the prepared pans and bake until the cakes are puffy and a tester comes out clean, about 20 minutes.  Cool the pans on a wire rack for 10 minutes, then remove the cakes from the pans and allow them to cool directly on the rack.  (This is why I like Wilton's bake easy or even the cake release from Pam, I used the old fashioned grease and flour techniques, and they stuck and broke apart.)  I used Wilton's flag pan and 1/4 sheet pan.

I had a hard time frosting the cake because it was so crumbly, which is why I hid the sides with a zig zag border that covered the whole side.  I was not very worried about the middle since I knew the flag cake would cover it up.  I used "fluffy" icing which does not crust.  It tastes good, but is not as easy to get smooth as regular buttercream.

This was my first time to work with an airbrush, I do a lot of my experimental cakes on my friends at church!  I don't think they mind too much eating my experiments!  My husband said to always hold your airbrush like you would a pen or pencil and slowly work the little lever.  (I really do need to take an airbrush class!)  I covered my table to keep my table clean, and that night I noticed that the bottom of my feet were blue, I must have dropped some coloring on the floor, and I never wear shoes at home!  LOL 

 First I put parchment paper under my cake to keep the cake board clean.  I then colored the bottom layer blue.  Then I added the flag and colored my square blue then my red stripes.  If my icing had "crusted" I would have used parchment paper to make "stencils"

 By this time it was 10:45 and I had to leave for church in 15 minutes.  I was all ready, I just needed to add my stars.  I chose to make it a colonial flag, because it was faster!  :)  I added a border around my flag to hide all the imperfections where the two cakes met.  I then needed to pull off the parchment paper.  You can tell I started my stripes at the top.  I applied too much pressure and the color smeared.  The tie dye looks kind of neat though!


I was on my way to church, and even though I washed my hands after this picture was taken, they were still pretty red and blue!  I was still doing pretty good on time for church.  I needed to grab a piece of shelf liner to keep my cake from sliding, and I knocked an Izze over which landed on the ground, the lid popped off and and it squirted all over my shoes, up my dress, all over my arm and face into my eyes!  I had to splash my face with cold water to get the Izze off.  I did not have time to change clothes, but I was on time for church!  LOL!

A couple of pointers I learned:  1.  Make sure your parchment paper covers the entire board or your edges will be blue.  2.  Airbrushing highlights every imperfection of your frosting job.            I have to tell you the finale of my cake story.  For those of my friends who know me, they know sometimes what I am thinking in my head -does not come out of my mouth.  I held up the cake before I cut it at lunch time so everyone could see it first.  I wanted to say:  "Here is your Independence Day Cake", (remember that I go to a Baptist church and that my voice carries),  What I said is:  "Here is your St. Patrick's Day Cake!"  I still don't know why that came out of my mouth, but everyone sure got a good laugh about it!    Did anyone else have any interesting stories from this weekend you would like to share?  Any comments about my cake or questions? If you have any airbrushing hints I would love to hear them also please, I can use all of the help that I can get! I would love to hear from you so be sure to leave a comment!
Happy Baking!
Missy
Thursday, July 1, 2010

Lace Silicon Mold

 I was asked to test out a product from decorate the cake and I picked the Lace - Double Flower Center Mold. I had never used a lace mold before and I was very excited to try it out!  My cake did not turn out as I expected though which was very embarrassing!


I’m sorry about the glare, I like to do my fondant work on my cutting board and the flash made a terrible glare!

First I dusted my mold with a little powdered sugar. Then I took a mixture of chocolate fondant mixed with modeling chocolate and rolled a log and “smooshed” it into the mold. I put too much fondant into the mold and had to “cut” some of it out. It was too hot in my kitchen to be using modeling chocolate so the impressions did not turn out as well as I would have liked.

Be sure to put powdered sugar on your board to prevent sticking. Doesn’t it look great with this dark brown? It tasted yummy too!

I made a small cake for church so that I could test these molds out.


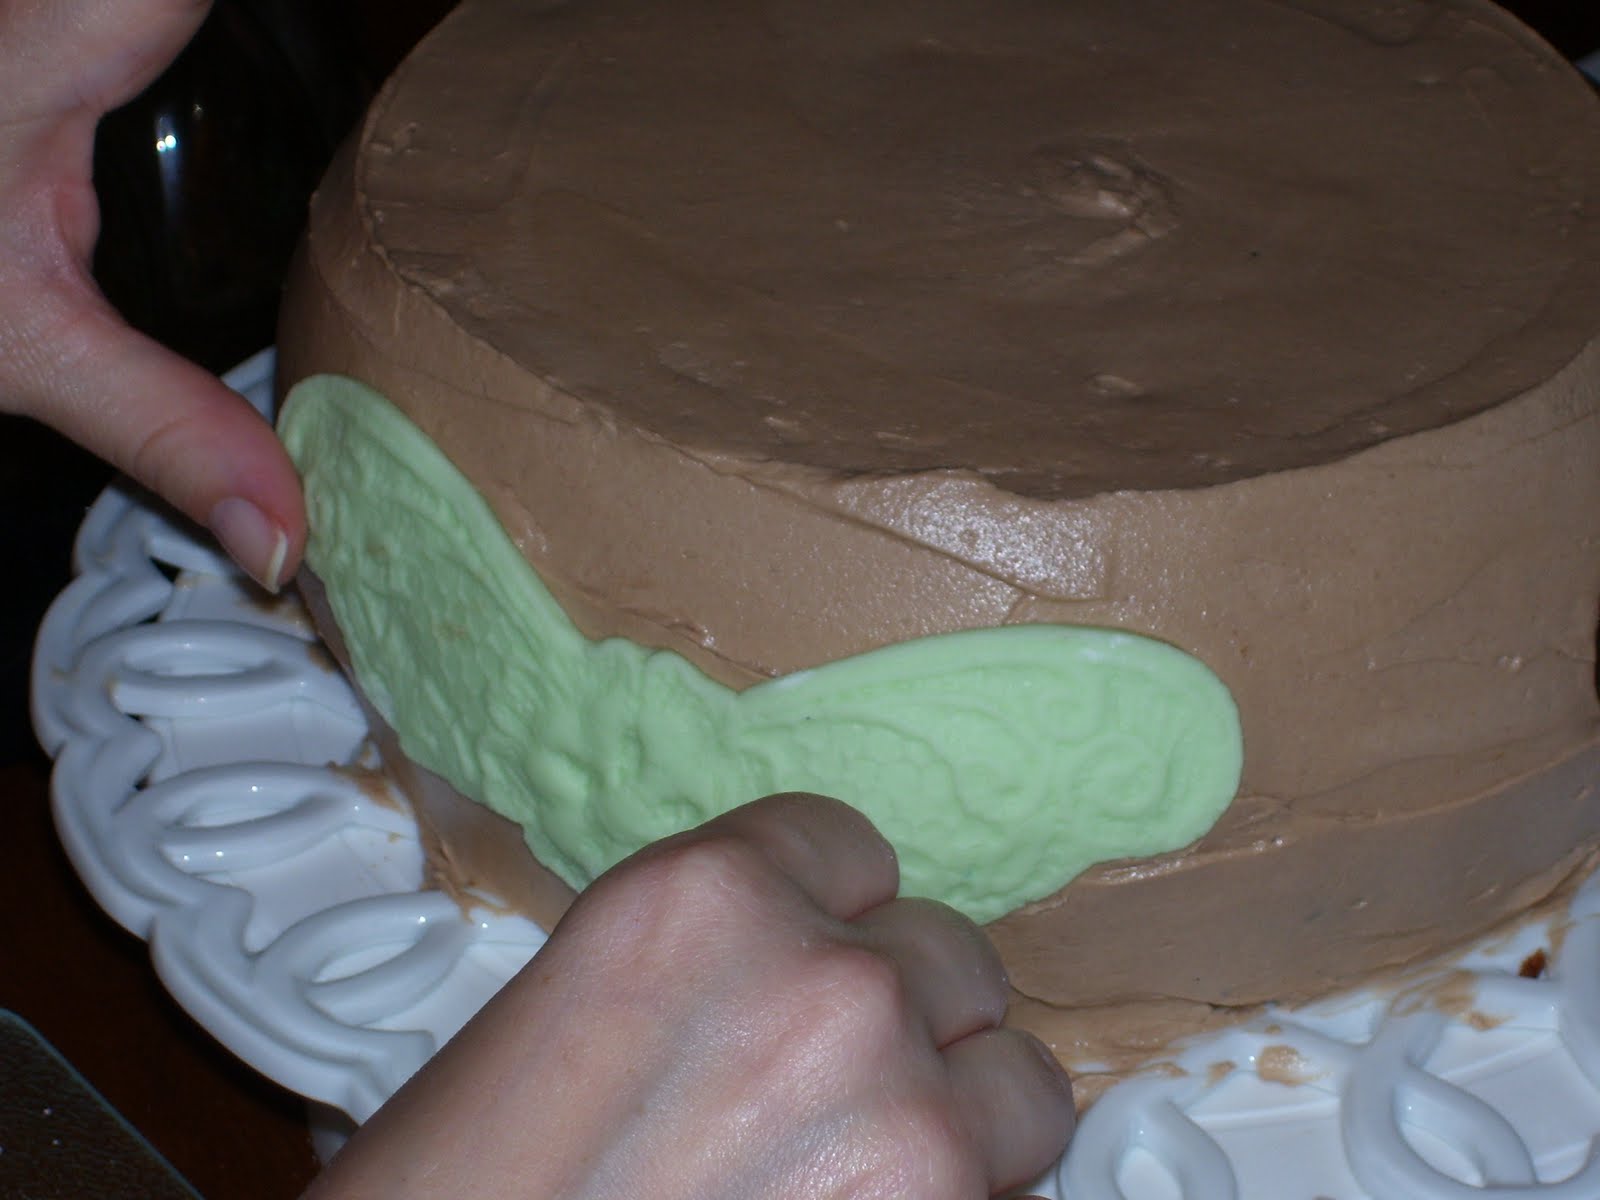
The best part is how easily it molded onto the round curve of the cake and was very quick and easy to make.


Wouldn’t this also look great as wings on a bat or bird? Just make the middle part a bird or something and you have a double use for this mold!


Next I tried out just straight fondant, I used green so you could see the fondant in the mold.

I tried rolling the fondant onto the mold, but that didn’t work out very well.


(Yes, I know that my apron looks like a hospital gown here, but I promise that I am not crazy!)

Next I used an angled spatula cut excess fondant out.


It was very easy to just place the lace onto the buttercream, if my cake had been covered in fondant, I would have used either water or vanilla extract to adhere the fondant.  This one was not as clear either.

I tried a different approach on my third lace mold. I tried using even less fondant.

First I took the fondant and flattened it out in the basic shape of the mold in my hands.

Then I “smooshed” the fondant into all the crevices of the mold.  I then took my roller and rolled the fondant smoothly into the mold.


I used my spatula to take away any extra fondant.  The fondant peels out of the mold very easily.


I then trimmed off any extra fondant again after removing it from the mold.


I centered the lace where I wanted it to go and pressed it gently onto the cake.

This lace turned out the best. I had used less fondant on this one and I was able to get every detail to show. I LOVE this mold.

You can also make impressions onto fondant to cover the cake.

I rolled my fondant out onto the board.  I then gently pressed the mold onto the fondant. Do not use your roller, it distorted the image.

My picture of the good impression did not turn out, but you can see what a pretty design it makes here.

This mold would be great for any kind of fancy cake, and it is big enough to use on big cakes or as the entire design on a small cake.  If you would like to purchase this mold go here:  http://www.decoratethecake.com/store/Default.asp , they are also on facebook: http://www.facebook.com/#!/pages/Overland-Park-KS/Decorate-The-Cake/246958540088?ref=ts&ajaxpipe=1&__a=26 
I hope you enjoy using molds as much as I did, I have more to come!
Happy Baking,
Missy

Wednesday, June 30, 2010

Shoebox And Shoe Cake Tutorial

I have been wanting to learn how to make high heel shoes for cakes and I found these great tutorials on how to make a high heel shoe and matching shoe box!  Thank you Ann Heap from pinkcakebox.com!

Part 1

Part 2

Part 3


What a great tutorial, I can't wait to make one now!

Have fun decorating!
Does anyone have any fun cakes planned for this Independence Day Weekend?  I'm going to try out my new airbrush!

Missy


Tuesday, June 29, 2010

Cookie Favors Recipes


 My friend Clarissa is an amazing cook and mother.  (I wish I had a picture of her cooking!)  She has five children, here are her two girls, and when you have that many kids you have to know how to cook.  She doesn't like to bake though.  I needed someone to make the favors for the shower and I knew she would do a great job.  I wanted cookies as favors, I was thinking simple chocolate chip cookies in bags tied with brown ribbons.  I had not really thought about it, so I gave her my idea and let her run with it.  She surprised me by making three different kinds of cookies, and they were delicious!  She said she wanted something simple with very few ingredients, well these were great!
Shortbread Cookies

Ingredients:

*2 cups butter
*1 cup packed brown sugar
*4 1/2 cups all-purpose flour
*1/2 tsp almond extract  (FYI: I love almond extract!)

Directions:

1.  Preheat oven to 325 degrees F (165 degrees C)
2.  Cream Butter, brown sugar and almond.  Add 3 - 3 3/4 cups flour.  Mix Well.
3.  Sprinkle board with the remaining flour.  Knead for 5 minutes, adding enough flour to make a soft dough.  Roll to 1/2 inch thickness.  Cut into 3x1 inch strips.  Prick with fork and place on ungreased baking sheets.
4.  Bake at 325 degrees F (165 degrees C) for 20 to 25 minutes.


Gooey Butter Cookies-( I personally didn’t like these cookies but the husband and the boys loved them..go figure, this is Clarissa's note!)


Only changes-you can change the yellow cake mix to a scratch one and used palm sugar.

Ingredients

• 1 (8 ounce) package cream cheese

• 1/2 cup butter, softened

• 1 egg

• 1/4 teaspoon vanilla extract

• 1 (18.25 ounce) package yellow cake mix

• 1/4 cup confectioners' sugar

Directions

1. Preheat oven to 350 degrees F (175 degrees C).

2. In a medium bowl, cream together the cream cheese and butter. Stir in the egg and vanilla. Add cake mix, and stir until well blended. Roll into 1inch balls and roll the balls in the confectioners' sugar. Place 1 inch apart onto an ungreased cookie sheet.

3. Bake for 10 to 13 minutes in the preheated oven. Remove from baking sheets to cool on wire racks.

Clarissa said that she used granulated palm sugar to roll the cookies in, and she used a yellow cake mix.  I bet these would be delicious with lemon, orange, or chocolate cake mixes!


These next cookies are absolutely scrumptious!  She made them with carob chips, but carob chips are very expensive so she made her own!  She made the carob chips a few days in advance so that she wouldn't have to worry about them later, she kept them in the freezer.

Homemade carob chips/bark
Ingredients


• 1 cup coconut oil, liquefied

• 2/3-3/4 cup carob powder

• 2 tablespoons vanilla extract

stevia, to taste (or other sweetener)

Directions

Mix all ingredients together in a bowl/saucepan.

Pour the mix into a rectangular baking dish lined with a sheet of wax or parchment paper. The size of the dish will depend on how thick you want your chips to be.

Put the dish into the freezer to set. It shouldn't take very long; maybe 20 minutes or less.

Take out baking dish and break carob into chips/chunks. Store them in the fridge.


No bake oat bars-only change is I used palm sugar and carob

Ingredients

• 1 cup butter

• 1/2 cup packed brown sugar

• 1 teaspoon vanilla extract

• 3 cups quick cooking oats

• 1 cup semisweet chocolate chips

• 1/2 cup peanut butter

Directions

1. Grease a 9x9 inch square pan.

2. Melt butter in large saucepan over medium heat. Stir in brown sugar and vanilla. Mix in the oats. Cook over low heat 2 to 3 minutes, or until ingredients are well blended. Press half of mixture into the bottom of the prepared pan. Reserve the other half for topping.

3. Meanwhile, melt chocolate chips and peanut butter in a small heavy saucepan over low heat, stirring frequently until smooth. Pour the chocolate mixture over the crust in the pan, and spread evenly with a knife or the back of a spoon.

4. Crumble the remaining oat mixture over the chocolate layer, pressing in gently. Cover, and refrigerate 2 to 3 hours or overnight. Bring to room temperature before cutting into bars.


I asked Clarissa if she had any hints about making these cookies.  Here is her answer:

"For the carob chips, I hardened them in the freezer and melted them for the cookies….had to do it that way because I was making the chips way before the cookies AND I wanted to eat it like bark, yummy."

"With these 3 cookies, I mixed up the shortbread first and threw it in the oven….at the same time making up the gooey recipes, then moving on to the no bake last…so I was easily able to make 3 different recipes at the same time(not counting making the carob chips earlier)"

Thanks Clarissa for the yummy recipes, the favors were a hit, even though poor Siouxsie didn't get any!

Please leave me a comment and let me know what you think about these cookies!
Happy Baking,
Missy


"Oh taste and see that the Lord is good: blessed is the man that trusteth in Him." Psalm 34:8