
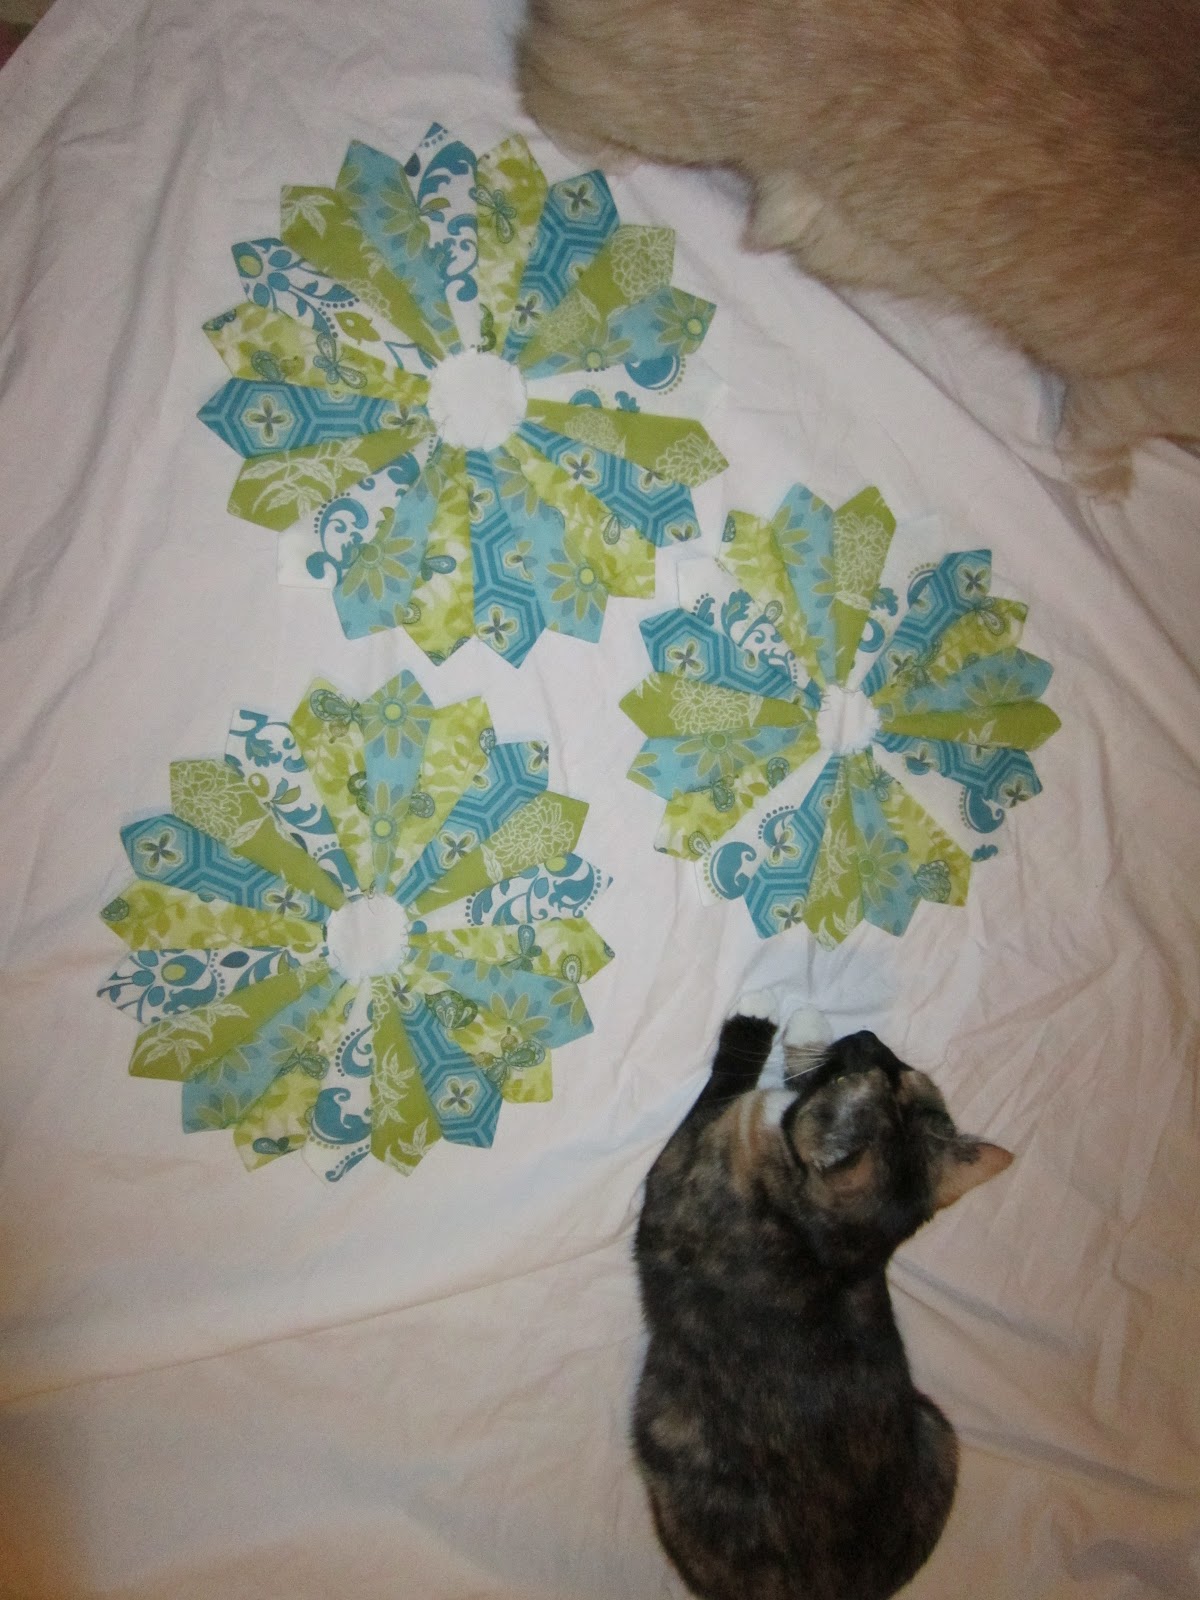
I have only finished three of my Dresden plates, although I have not ironed them yet. I am going to sew all the plates and then iron them all at once. I am going to have to do some super sewing! I just learned that I am going to need 20 blocks instead of 12! Thank you
Kati from Kati's Quilting and Sewing for your help in figuring out the dimensions! Be sure to heck out her Dresden Plate quilt.
As usual Pippi decided to help me with my quilting,
so I made her pose with a block. I had to hold her paws because she tried to take it off.
She is such a hoot! In my last post I showed you
how to make the wedges here. Today I will show you how to sew the wedges together.
The first thing you should do is lay your wedges out in the order you want them because they
will may have gotten mixed up some when you made the wedges. I have tried to make each block's order a little different so they do not all look the same. I am probably the only one who will notice!
First you need to put two wedges together, right sides facing. Line them up from the top corners because the bottoms will be covered by your circles. (BTW, I am thinking of making yo yo's for the middle, what do you think?)
Start sewing at the top, but a 1/4 inch down.
Can you see where my needle is? I put it right below the line of my tip. Then you sew backwards, but do not go off the fabric. My needle got stuck when I sewed forward. This secures the edges. I know we don't normally back stitch on quilt blocks, but several sources said to do this.
I tried chain stitching and doing two wedges, two wedges and then sew those 2 sets together and then add the fifth to make sections of five, but I kept getting the wedges mixed up and out of order.
Here are my sets of two after they are sewn together.
I decided it was easier to sew two sets of ten instead, adding one wedge at a time.
I did chain stitch in a way to save thread, I put a piece of cloth behind each wedge, cut the wedge off and added another wedge behind the fabric so that I would not have to keep snipping the thread.
Here are my two sets of ten, I then just sewed them together.
The last block did not take very long at all! Pippi was not helping and I had finally gotten the hang of sewing them together.
Tiger likes my blocks!
If you have any suggestions, please share! This is my first Dresden Plate quilt! I am scared to death of putting the plates on the background fabric. If you know of any tutorials on how to do that part, please let me know! Does it have to be hand stitched down? I do know that I need to cut 16 inch blocks. I think that was my most boring purchase at Joann's - white fabric.
What is on your Design Wall?
Missy


10 comments:
They're looking great! So now we know Dresden's make good cat collars, too?! Haha! I've never made one of these either, but your blocks are certainly giving me the hankering to make some! :)
Beautiful! Love the fabrics that you are using. I enjoy making dresdens they are addictive, aren't they?
Have a wonderful and Blessed day
Kristie
Beautiful. Dresdens do have to be sewn down, but you can do it by machine. I have a quilt started where some are hand done, but I needed to add a few more, so I did them by using a very skimpy blanket stitch with clear thread. It looks like hand stitching. I have some old ones (very old) that are sewn on the edges with a straight stitch. Some others have black blanket stitching on them. Just a few choices for you.
Beautiful blocks Missy and Pippi is just too cute with the dresden on!
I adore the cat collars -er, dresdens- I see a Halloween costume in the making!!! I have made several smaller dresen projects and all have been stitched down with a button hole stitch. As much as I love hand sewing hexies (and even binding), I try to do everything else on my machine...
I'm hooked on Dresdens! I'm teaching a class in them next week so I have some suggestions: I chain piece 2 'blades' together, 2, 2, 2 until they're all gone. Then I sew 2 to 2 (making 4) then sew 5 of the 4-blade pieces to make the Plate. I think you'll find that pressing after each seam is the way to go. You'll se when you try to press all 20 blades in one shot! As for a yo-yo in the center, you need to cut a 6 1/4" circle and you'll find that after sewing it, you'll have about a 5/8" open hole in the center--not pretty. But maybe you know how to do it differently. (If so, tell me!) When the Plates are done and pressed, place them on your background square and either pin or glue them (sparingly) down. Run just a few basting stitches through the plate (I use my machine on a huge stitch). Then hand sew them down. You'll find that if you use a machine to do it, all the twisting and turning is a pain in the neck! Hand sewing is like putting on a binding--no sweat! Happy quilting!!
Looking good - but I think you cat may have stole the show ;-)
This is coming along beautifully, Missy! The colors are just gorgeous! And how cute is Pipi, modeling one the the plates?!
~Cindy
Looks like I am not the only one who loves it....HA!!
ditto all above compliments, giggle. Love it! Thank you for sharing at the Thursday Favorite Things hop. Your participation helps make it a success.I'm sorry I am slow to visit this week as I am fighting a nasty head cold and my time on the computer has been limited.Wishing you a beautiful day .
Post a Comment