"She looketh well to the ways of her household, and eateth not the bread of idleness." Proverbs 31:27

Tuesday, February 28, 2012

How to sew on a button - fast


We had a button party on Saturday night to sew buttons on the quilt for the doors on all the birdhouses.  We sewed on 45 buttons.  I worked at a dry cleaners while I was in college for a few months.  I learned how to sew on buttons the quick and easy way and thought I would share the handy trick with ya'll.  Please excuse the picture quality, I forgot my camera and had to use my phone.
First you pull off a piece of thread, I usually do from my hand to my shoulder.
Then you fold that long piece of thread in half.
 Take the end with the loop (at the fold) and put it through your needle.

 You now have 4 strands on your needle.

 At the bottom of the four strands tie a knot and you are ready to go.  Now you only have to go through your button once or twice and will save a lot of time!

Here I am showing everyone how to thread their needles.

We had lots of help!  Valerie is really concentrating.
Her sister Tabitha is also helping.  They were promoted from ironing all the fabric.
Pam is sewing buttons while I had Lauren snipping my threads from the quilting and cutting pieces of thread for the button sewers.
I was hand quilting the embroidery block while Kristi hand quilted the birds.
I found that an embroidery hoop also helped with the hand quilting.
Cynthia was also helping with buttons while Ebbye took pictures.  (Tabitha and Valerie's mom.)  She also took pictures of the kids playing while we worked.


Here are some random pictures, hope this tutorial helps.  I have to get back to quilting, I only have two days left!
More posts of the quilt are here:
http://missyscakesandaprons.blogspot.com/2012/01/birdhouse-quilt-progress.html
http://missyscakesandaprons.blogspot.com/2012/01/birdhouse-quilt-update-2.html
http://missyscakesandaprons.blogspot.com/2012/02/i-have-had-terrible-day-want-to-hear.html
http://missyscakesandaprons.blogspot.com/2012/02/birdhouse-quilt-update-4the-back.html
http://missyscakesandaprons.blogspot.com/2012/02/birdhouse-quilt-update-5basting.html


Saturday, February 25, 2012

Chatelaine

This week I ran across a chatelaine.  I had never heard of one before.
This is the one I saw.  I am putting this under quilt since it is for hand quilters.  It is a chatelaine and if anyone knows where I can find a tute for one, let me know!
From this blog http://shelbystitcher.blogspot.com/2012_02_12_archive.html But I can't find the link. She has little pockets for thimbles, a pin cushion, a place for her thread and ribbon for her scissors.  Good news, someone found the link for us!  http://shelbystitcher.blogspot.com/2007/12/hand-quilting-godsend.html
I didn't have time to make a whole one, but really wanted one for tonight's quilting bee.  Last time we had everything sitting on the quilting loom, pretty disorganized.
I won an abascus necklace from www.leadingladies.etsy.com and when I saw the link knew it was perfect to give me a start on making one.
I knew I wanted to make a place to put my needles and seam ripper.

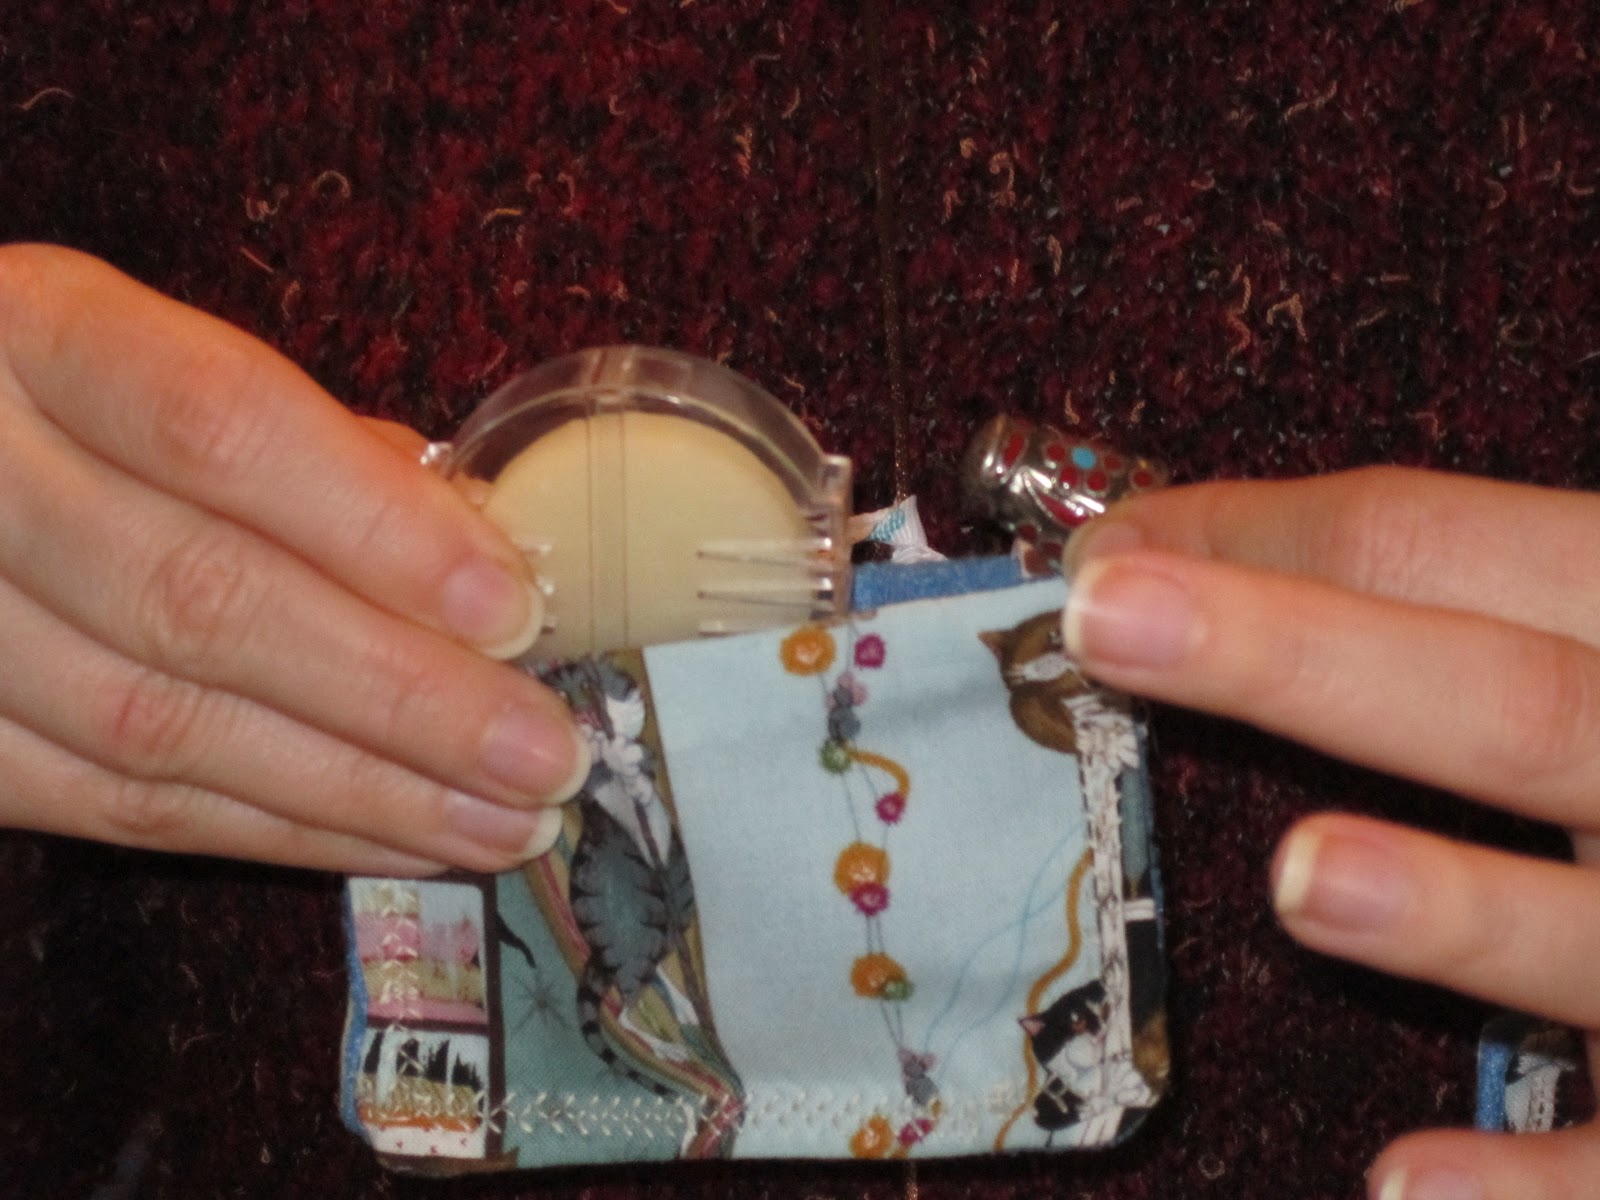
And a place for my beeswax and thimbles.
I took some cupcake ribbon and tied a piece onto my necklace so that I could tie my spool of thread on there.  I also tied a ribbon on the other side for my scissors.
I ended up not using the smallest strip.  I cut four pieces, two long and two wide for the front and back of the two "pockets".   Make sure they are the same size, then cut feltl for each piece - I used my shears to help prevent fraying.
I then sewed each piece of material, right sides together.  Leave an opening so you can turn it out.
I wanted a nice finish for the top of the pockets, and the felt gives it more stability and a place to put my needles.
Match your two pieces up, wrong sides together.  Leave the top open, and place your ribbon between two pieces of material before sewing to make the loop/strap thingie.  I tied the ribbon onto the necklace first.
Next fill up your pockets and stick your needles on.
This will be great in the car, at quilting bees, doing embroidery or applique or any kind of hand sewing!  I'm sure as I use it I will find ways to tweek it though.  I love the bit of bling I get from the necklace!   I still need to make me a ring cushion, but that will have to wait until I have time.  I have included some links to some tutes and pictures of different ones.  Be sure to read the second link which gives you the history of chatelaines.
Here is a crazy quilt one
http://www.judithbakermontano.com/JBMwebsite/classes_html/classes_cq_f.html
Here is some great information with some pictures of some antique ones - I really want one of these!
http://www.free-quilting.com/content/content.html?content_id=196
Here is a mini tute in the comments
http://www.quiltingboard.com/main-f1/chatelaine-t63.html
Here is a pattern you can buy
http://appleblossomquilts.danemcoweb.com/shop/product/appliquer-s-chatelaine/
Here is another version with a small purse on it.  Free tutorial
http://quiltdoodledesigns.blogspot.com/2010/11/quilters-chatelaine-must-have.html
You can also buy ones that look like jewelry.
If I make a better one later, I'll be sure to share it with ya'll.
If you have one or know of any good tutorials for making one, please share!  Tonight we are sewing about 50 buttons on the quilt, and I am still not done with the machine quilting, so I need to get to work!
Have a great weekend ya'll!
Missy
Update:  I made it too long, I almost sewed my scissors to the quilt.The pocket holding the beeswax and thimbles needs to be closed somehow, my beeswax kept falling out.    You want to make it a little shorter, however it was very convenient.

Thursday, February 23, 2012

Always listen to God's promptings


I've had a very busy week.  I've been going to the chiropractor three times a week.  With the therapy also, the appointments are almost one and half hours long.  They have decided to total our car so we have until Saturday to buy a new car since we only have one car and the rental is due back Saturday.  Please pray the Lord provides a car that runs great and we like.  I would be happy if it was yellow also.
Since we have church on Thursdays, I had my husband drop me off first thing for my appointment this morning then walked home since my husband had the car at work.  It took me 50 minutes to walk home so I was not home until 11 today.  But I did enjoy the walk.
I have also been quilting the quilt.  It takes a long time to quilt a king size quilt on a home sewing machine.

I teach the kinder-care class at church.  2-6 year olds.  My class is pretty full, but we finally have enough teachers to split our class next week.  We have another class next to mine, 7-11 year olds.  Right after class started all the power in the children's building went out.  (we have three small  buildings) I went and got a couple of the men out of their class to fix the power in our building.  My children were very good when the lights went out.  I was very proud of them.    The men got the power back on.  Meanwhile I found my flashlight on my cell phone.  The lights went out again, so I decided to take the children into the foyer to have my class.  We have a conference table in there.  I grabbed the kids and my stuff and took them in there.  It's a good thing I have taught the children to walk in a straight line, it made it a lot easier.
We had been in our there about 30 minutes when one of the older children from the other class came running in there saying there was a fire in their class.  They got the men from their class who went running in there past my children.  I only had a couple of my kids get up, but they did a great job staying in their seats and not get caught up in the "chaos".  From what I gather there were sparks in the light but no real fire.  But can you imagine if I had not listened to the Lord's nudging and had to move almost 20 children out of there when the "fire" had started?  I praise God that no one was hurt.
I have several tutorials and recipes to share, I'll have more time next week to get the posts ready for ya'll.  Have a great day ya'll!
Missy

Tuesday, February 21, 2012

Machine Quilting Questions

I have started machine quilting my king size quilt.  I definitely need a big work area, I am using my dining room table and to my left I set up my ironing board at the same height as my table for the quilt to sit on.  I found a great video/tutorial at http://www.allpeoplequilt.com/videos/  .   Be sure to watch this video, and an expert tells you how to quilt a big quilt on your home sewing machine.  This is great for people like me who do not have a long arm quilter but want to do their own quilting.
If you'll remember we started hand quilting the center a week ago.  http://missyscakesandaprons.blogspot.com/2012/02/hand-quilting-bird-house-quilt.html  Since my goal is to have it quilted and bound by Friday so that we can meet together for one last quilting bee (for this quilt), to  sew on a lot of buttons for the doors to the bird houses, I need to get it quilted this week.
Mabeth, in the above video, says to not worry about rolling the quilt and just scrunch it up into the arm while quilting.  I tried both and must agree with her.  You also need to use both hands to keep the batting and everything smooth as you sew.  This prevents puckers.  It would help tremendously if I had an extension table for my sewing machine.  I've already told my husband he needs to make me one.   I want a big one to set right on the table, this is in lieu of a sewing machine cabinet.

She also said to fold your ends over to slid under the foot easier.  This keeps your sandwich from getting tangled in the foot.  She has a lot of good info so be sure to watch the video.
I'm not sure how well you can see it, but I started by sewing in the ditch horizontally straight across the quilt. I'm doing both sides of the sash and through the middle of the 4 patches and the birdhouses since they line up exactly.  I know that I will also quilt both sides of the triangle of the roof top.
My first question is, when I sew it up and down, as you can see my lines do not line up.  Should I still sew in the ditch only or keep with doing straight lines all the way up, even if it is not in the ditch?  I'm hesitant to sew straight across the birdhouse.  I am afraid of under quilting it.  Do I need more lines horizontally also?  It would have been great doing free motion quilting, and I did just buy a foot set, but I need to practice first before doing it on a quilt.
My second question is, See the embroidery block?  For right now I'm just quilting around it, but I know that it will need some quilting.  Should I hand quilt it, and if so in what way to avoid messing with the design?
Thanks in advance for answering all my questions!  The only thing I have quilted before was a small wall hanging that was in the ditch mostly and lined up symmetrically.  LOL
Of course Pippi is being her usual helpful self!  She is going to miss this quilt when we give it away, and yes, I will wash it first!  LOL  

Missy

Wednesday, February 15, 2012

Hand Quilting the Bird House Quilt

I had my first quilting bee on Saturday!  Only four of us came since the only loom we could afford was so small, 2 ft by 4 ft.  Maybe one day our church will be able to get a bigger one.  Pam, Skye, Miss Debra and I spent almost three hours sewing on the quilt.  You can tell I was there to work since I had my braids and bandana on.
Miss Debra has been hand quilting her whole life and offered to teach us.  We have to hand quilt the middle since I cannot fit the whole king size quilt in my machine.  I recorded Miss Debra while she was explaining the tools needed for hand quilting.  Miss Debra is such a fun lady and it is me talking in the background asking her questions.  I am not an expert at videography but there is still a lot of good info here.  It looks like the videos are popping up at the bottom of the blog, I'm still trying to get used to the new blogger interface.
She suggests using wax to keep your thread from getting knotted when hand sewing and of course a thimble.  I used my antique thimble from this post   http://missyscakesandaprons.blogspot.com/2012/01/antique-quilts-and-thimble.html I also used my green rubber thimble, Miss Debra used a leather thimble.  Watch the video below to hear how she uses her thimble and to see what it looks like.
Here is a picture of my thimbles, I've written a previous post about my antique thimble (the silver one with red flowers), it fits my skinny fingers with long fingernails perfect!  Those short cheap ones that come in kits never fit my fingers.  I got the rubber green one from a quilt shop and it does not work if you are trying to press a needle through heavy material but works fine for quilting.  In fact I was quilting with the green thimble under the quilt and the antique thimble over the quilt.  I kept taking them off and stabbing myself too!  LOL

Pam's stitches were so tiny and precise

Whereas my stitches were horrible!
When we met on Thursday at Miss Debra's daughter's house who also knows how to hand quilt, Skye and Joeann put me to shame with their beautiful hand stitches!  LOL
 Miss Debra says the goal is to have 20 stitches per inch but she usually does about 10?  I did maybe 3-4 per inch!  But I can only get better right?  The second video shows how to do the hand stitching.
This is a running stitch, but as you can see my stitches were too far apart and for a newbie like me, my stitches were better when I went up and down in the material.  I also found I was able to hide my knots in the batting easier when I scraped my fingernails on it while slowly pulling it up through the bottom quilt,  this is to ensure you don't have a knotty bottom quilt.

These were just some hints on hand quilting until I learn more and when I have more time to spend on a quilt I would love to hand quilt a whole quilt, but a couple of weeks is not enough time.  For the most information watch the videos from the expert herself.  Whoops, I forgot she told me to make sure ya'll knew she was not an expert!  LOL  The deadline I set for myself is February 24 when we will hopefully have our last quilting bee to sew all the buttons on the bird houses.

I found some good information here on hand quilting also:  http://quiltville.blogspot.com/2012/02/ask-bonnie.html  I think I want one of those personal looms.
Be sure to check out this great post on hand quilting and thimbles http://quiltville.blogspot.com/2012/02/its-thimbles-up-monday.html

Happy quilting ya'll!
Missy
More posts of the quilt are here:
http://missyscakesandaprons.blogspot.com/2012/01/birdhouse-quilt-progress.html
http://missyscakesandaprons.blogspot.com/2012/01/birdhouse-quilt-update-2.html
http://missyscakesandaprons.blogspot.com/2012/02/i-have-had-terrible-day-want-to-hear.html
http://missyscakesandaprons.blogspot.com/2012/02/birdhouse-quilt-update-4the-back.html
http://missyscakesandaprons.blogspot.com/2012/02/birdhouse-quilt-update-5basting.html
"Oh taste and see that the Lord is good: blessed is the man that trusteth in Him." Psalm 34:8