"She looketh well to the ways of her household, and eateth not the bread of idleness." Proverbs 31:27

Thursday, March 17, 2011

His Eye is on the Sparrow Cake

I used the recipe for my lemon meringue cupcakes from here: http://missyscakesandaprons.blogspot.com/ to make the "center piece" cake of the cupcakes. Please excuse the quality of some of the pictures, thay are kind of fuzzy.   I started by making the nest first.  I added some gumpaste mix to my fondant and formed a "nest" shape over a bowl.  Next time I will put crumpled aluminum foil over the bowl first to give texture to the inside of the nest. 

Then I used crumpled aluminum foil to add texture to the nest by pressing it on top of the nest.  Then I rolled several "snakes" in varying lengths to put around the nest for a "twiggy" look.  I used lemon extract to stick on the twigs.  I used the aluminum foil to press the twigs on with to add more texture.  I've never seen a smooth nest before so I tried to give it as much texture as possible.  I let it dry overnight, I really should have made it a couple of days before, but I forgot.

 I found several pictures online of birds made from fondant that I liked.  I started with the body and "pulled" the tail out from the back.  I used the back of my palette knife to mark lines in the tail to look like feathers.  I had the birds' tails resting on the edge of my tray to dry so they wouldn't droop.

I then broke a toothpick in half (some people would suggest using a piece of spaghetti) and stuck it in the body where I wanted the head to go.  When I made the head, I made a ball then elongated it just a tad bit.  I used the extract on the head where I wanted it to stick to the body.  When I made the beak I rolled a cone, then stuck my knife in the middle to open it a little. and attached it and two little black dots (eyes) to the head .  For the wings, I rolled a tear drop shape and then rolled it smooth with a roller.  Then I used the back of my palette knife again to make feathers.  I pulled some of the wings out to give it a more realistic look.

 I got the cutest baby mold here:   http://www.decoratethecake.com/store/WsDefault.asp?One=109         from Decorate the Cake.  I had been wanting to use this mold for the longest time!  I used copper color to make flesh coloring for the babies.  I made two babies for the nest since it was a double shower for two ladies.  Roll a sausage shape of the flesh colored fondant and press into the mold.  Here is a picture of the mold from Decorate the Cake's website.

 I read a great tip from Cake Central, after you put the fondant in the mold, put it in the freezer for ten minutes to harden, then it pops right out with no problems.  Let it dry before touching it to avoid fingerprints.  Use your palette knife to trim any excess fondant and any other areas that might need it.  Make sure you do not have any creases in the fondant, or it will show up on your baby.  That is why one of the babies have a hat.  I used carob powder to make the hair  and added a touch of dusting powder to the cheeks.  Aren't they adorable?


I used cutters to make the flowers and leaves.  When I noticed how terrible the inside of the nest looked, I added some toasted coconut.  I think it actually looked better with the coconut.  I waited until I got the shower and put a grapevine wreath on the green cake plate I picked up on clearance at Hobby Lobby for $7.  (Oh, I put the 6 in cake on a 7 in plastic cake plate.)  I iced the cake with IMBC, but the humidity made the icing "wet" and it would not smooth on, so I grabbed my airbrush gun and made the cake look like a tree top instead.  :) Sometimes mistakes turn out better then your original thought!  I really enjoyed making this cake!  For more about the shower go here:  http://missyscakesandaprons.blogspot.com/2011/03/his-eye-is-on-sparrow-baby-shower.html

I hope this tutrial will you help you with your next cake!  Any questions, feel free to ask, but you will have to leave me your email add. if you want a reply!
Happy baking!
Missy


Friday, March 11, 2011

Lemon Meringue Cupcakes

I made lemon meringue cupcakes for the shower, I made some that looked like bird nests and they were very cute, but I asked a young man to carry them in for me at the shower, and he let them fall over.  I actually cried when I saw them and had to walk away because I was so sad.  It was my own fault for not carrying them in myself.  They were my favorite ones too.  I made 12 nests, several with flowers that matched the cake and several mini cupcakes for the children.  The mini cupcakes were to make sure I had enough for everyone.  The cupcakes were a lemon chiffon with a lemon curd filling topped with Swiss meringue, and then my wonderful husband took a mini blow torch to them for me.  He's so sweet!  You can get the original recipe here:  http://www.ciaculinaryintelligence.com/2010/04/lemon-meringue-cupcakes.html
Mine don't look that pretty, I was going for more of a nest look.  The only thing is, my husband kept catching the cupcake wrappers on fire!  :)  If it had been me, I would have probably dropped the "on fire" cupcake and caught my kitchen table on fire.  I think this is why my husband offered to torch them for me!  This is the blow torch my husband bought me.  We used a $5 off coupon at Bed Bath and Beyond, so it was only $15. http://www.bedbathandbeyond.com/search/search.aspx/blow-torch/?sstr=blow+torch&grid=20&dim=1&nty=1&

Ingredients
Makes 24 cupcakes
Lemon Chiffon Cupcakes

3 cups cake flour (I used half organic, unbleached all purpose flour)


2 teaspoons baking powder (I used aluminum -free)

1 cup sugar, divided  (I used used thot not sugar)
4 large egg yolks

1 cup vegetable oil (I used grapeseed oil)

1 cup water

1/2 teaspoon vanilla extract

Zest of 1 lemon

4 large egg whites


Lemon Curd ( I doubled the cupcake recipe, but not the curd and I had some leftover)

1 cup butter, cubed

1 cup sugar (I used palm sugar)

1 cup lemon juice

Zest of 3 lemons

10 large egg yolks


Swiss Meringue Buttercream

4 large egg whites

1 cup sugar (I used palm sugar)

Directions

Prepare the Lemon Chiffon Cupcakes.

Preheat the oven to 375°F. Prepare pans with cupcake liners. Sift the flour, baking powder, and half the sugar together into a large mixing bowl or stand mixer and reserve. In another large mixing bowl or stand mixer bowl, combine the egg yolks, oil, water, vanilla, and zest. Mix with a handheld mixer or whip attachment until thoroughly combined, about 1 minute. Add the egg yolk mixture gradually to the dry ingredients, mixing with a handheld mixer or whip attachment on medium speed until a paste forms. (I accidentally did this backwards, and I believe it made the cupcakes dry)When a paste has formed, scrape down the sides of the bowl, and continue adding the remainder of the yolk mixture until it is all incorporated. Beat for an additional 2 minutes on medium speed. In a separate mixing bowl or stand mixer bowl, whip the egg whites with a clean whip attachment on medium speed until soft peaks form. Gradually add the remaining sugar while beating the egg whites and continue to beat until medium peaks form. Gently blend one-third of the beaten egg whites into the egg yolk mixture to lighten it. Gently fold in the remaining egg whites. Divide the batter evenly among the prepared pans. Bake at 375°F until the top of the cupcakes spring back to the touch, about 20 minutes. Let the cupcakes cool in the pans for a few minutes before turning out onto a wire rack to finish cooling before decorating.


Prepare Lemon Curd. (I would suggest making this the night before, and I did not cook it long enough so it was not as thick as it should have been, and make to strain it, I didn't it and it caused all kinds of problems when I was piping it into the cupcakes)

Combine half of the butter, half of the sugar, the lemon juice, and zest and bring to a boil over medium heat, stirring gently to dissolve the sugar. Meanwhile, blend the egg yolks with the remaining sugar. Temper the mixture by gradually adding about one-third of the lemon juice mixture, stirring constantly with a whip. Return the tempered egg mixture to the saucepan. Continue cooking, stirring constantly, until the whisk leaves a trail in the curd. Remove from the heat. Stir in the remaining butter. Strain the curd into a shallow container or bowl. Cover with plastic wrap placed directly on the surface of the curd. Cool over an ice bath. Store the curd, covered, in the refrigerator for up to 3 days.


Prepare Swiss Meringue Buttercream.

Put the egg whites and sugar in the clean, grease-free bowl of a stand mixer fitted with the whisk attachment and stir together until the sugar is blended into the egg whites. Place the bowl over a saucepan of simmering water and stir frequently until the sugar dissolves and the mixture reaches 140°F. Transfer the bowl to the mixer and beat on high speed until the meringue is thick and glossy and has a stiff peak.  (I was lazy and did not do this, wish I had, instead I melted the sugar with some water like I do with my IMBC)

Finish the cupcakes.

Fill a piping bag fitted with a large plain tip two-thirds full with lemon curd. Insert the tip as far as it will go inside the center of the cupcake and apply gentle pressure. Try not to squeeze too hard or lemon curd will squirt out the top of the cupcake. Stop filling once you see any lemon curd around the base of the tip. Repeat with the remaining cupcakes. Clean the piping bag and tip and fill it two-thirds full with Swiss meringue. Pipe a large pearl of meringue on top of each cupcake. Use the back of a spoon to lift up areas of the meringue, creating spikes. Lightly toast the meringue with a kitchen torch or under the broiler until the tips of the meringue are golden brown.


I tried the piping bag method, but my tip would not fit on a coupler and kept poking back up into the the bag.  I had lemon curd all over my hands.  Then I had lemon seeds that I missed because I did not strain the curd,  clog up the tip constantly.  So finally, I took a big tip and cut holes in the top of the cupcakes, and put a bigger tip on my bag to pipe out the lemon curd.  You can see the holes I made in the above picture.

It was worth the time and mess, they were delicious.  I've been putting the leftover lemon curd in my yogurt, it's delicious!


Wednesday, March 9, 2011

His Eye is on the Sparrow Baby Shower

I just co-hosted  a baby shower for my friends Lauren and Skye.  We have several pregnant ladies at church right, so we doubled up the ladies who have more then one child.  Skye is expecting her fifth child and Lauren is expecting her second.  Please excuse the photo quality of some of the pictures,the ones I took are fuzzy.  I gave my camera to my friend Pam and the ones she took are great!
To find out how to make the cake, go here:  http://missyscakesandaprons.blogspot.com/2011/03/his-eye-is-on-sparrow-cake.html
For the recipe on the lemon merigue cupcakes, go here:  http://missyscakesandaprons.blogspot.com/2011/03/lemon-meringue-cupcakes.html
Lauren and her daughter is on the left and Skye is on the right.  They took turns opening the presents.

When I started thinking up themes for this shower I thought of the song "His Eye is on the Sparrow" and I thought about how God takes care of us and our children.  I used the verses Psalm 84:3 "Yea, the sparrow hath found an house, and the swallow a nest for herself, where she may lay her young."  and Matt. 10:29-31 ".....Fear ye not therefore, ye are of more value than many sparrows."


My friend Julia painted the posters for me. Didn't she do a great job?


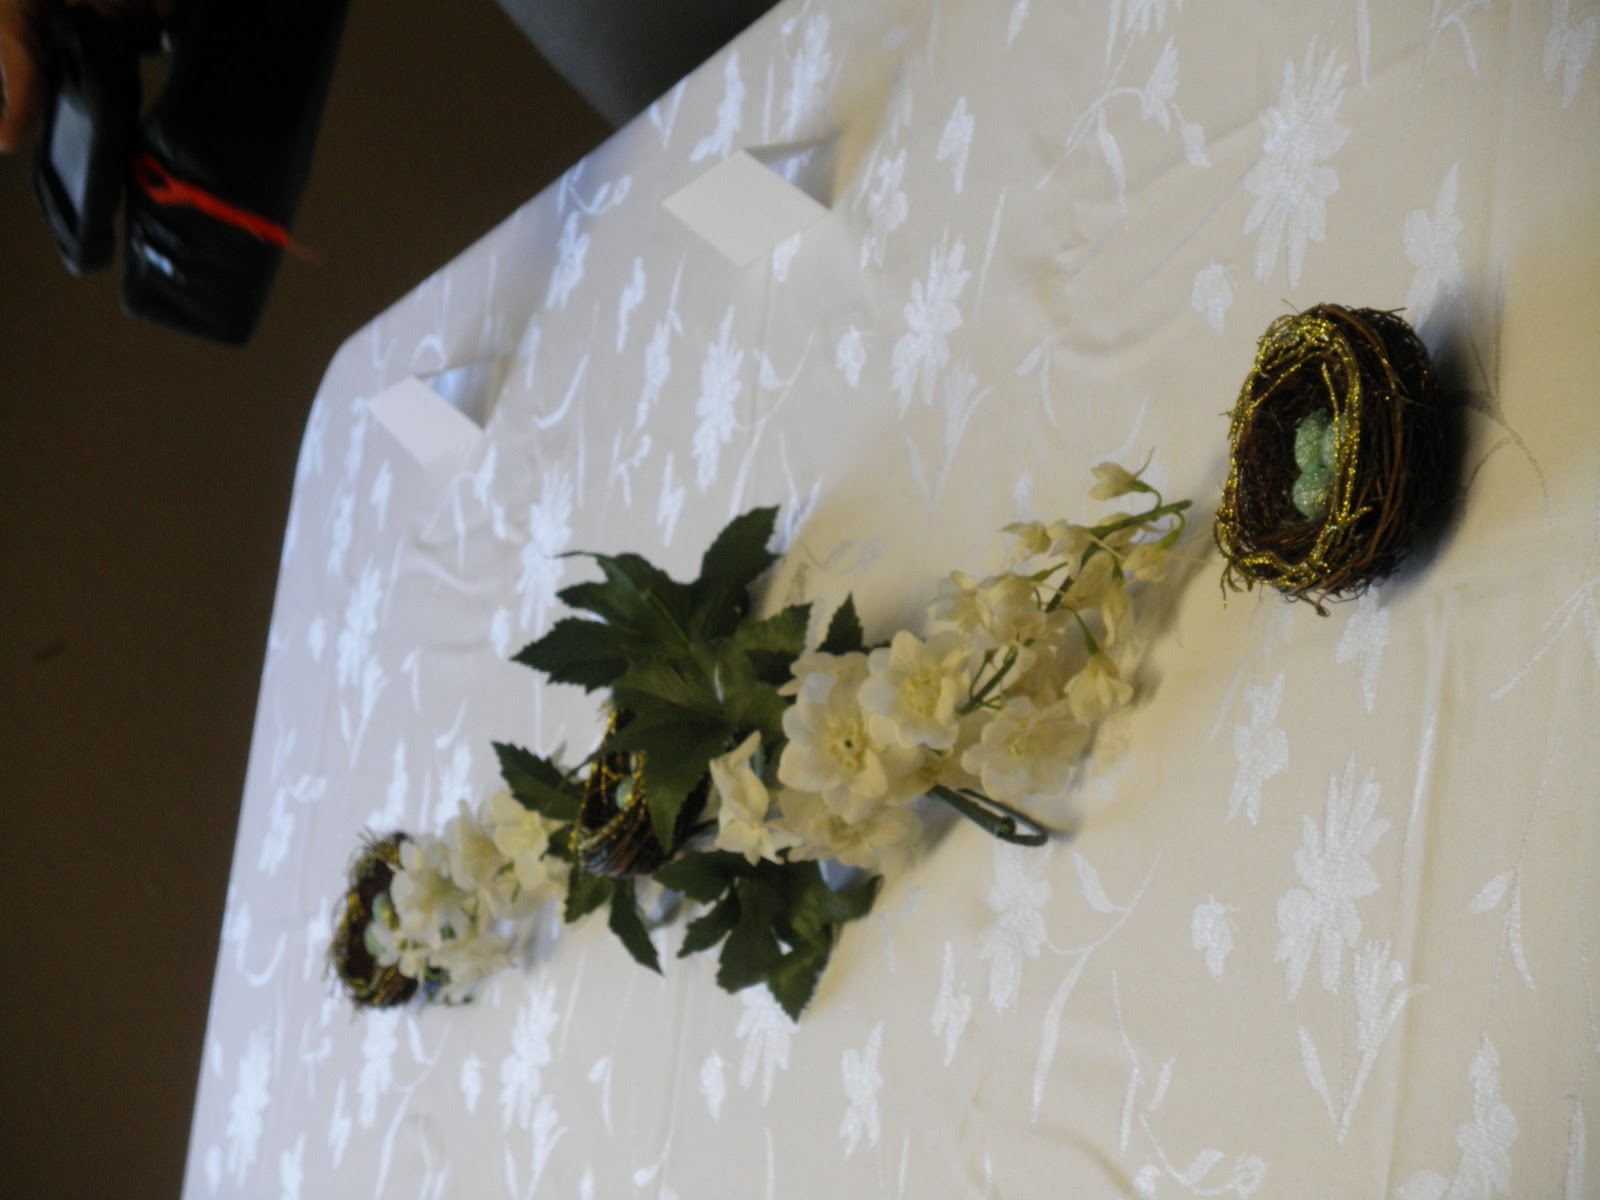
I found these Christmas ornaments on clearance for 75% off after Christmas for like 75¢ each.  I painted glue over the eggs and sprinkled blue glitter over them, borrowed greenery from my friend Marie who was helping with the shower, found the white flowers very cheap at a thrift store, and there was my table decorations!  They match the plates and napkins which I forgot to take a picture of.
I did this shower a little differently, we only had one game.  I took memory verses, cut them in half and they had to match up the verses.  Renee helped me with the game and gave the winner a bird feeder and bird seeder.  Katherine was pretty excited about her win!
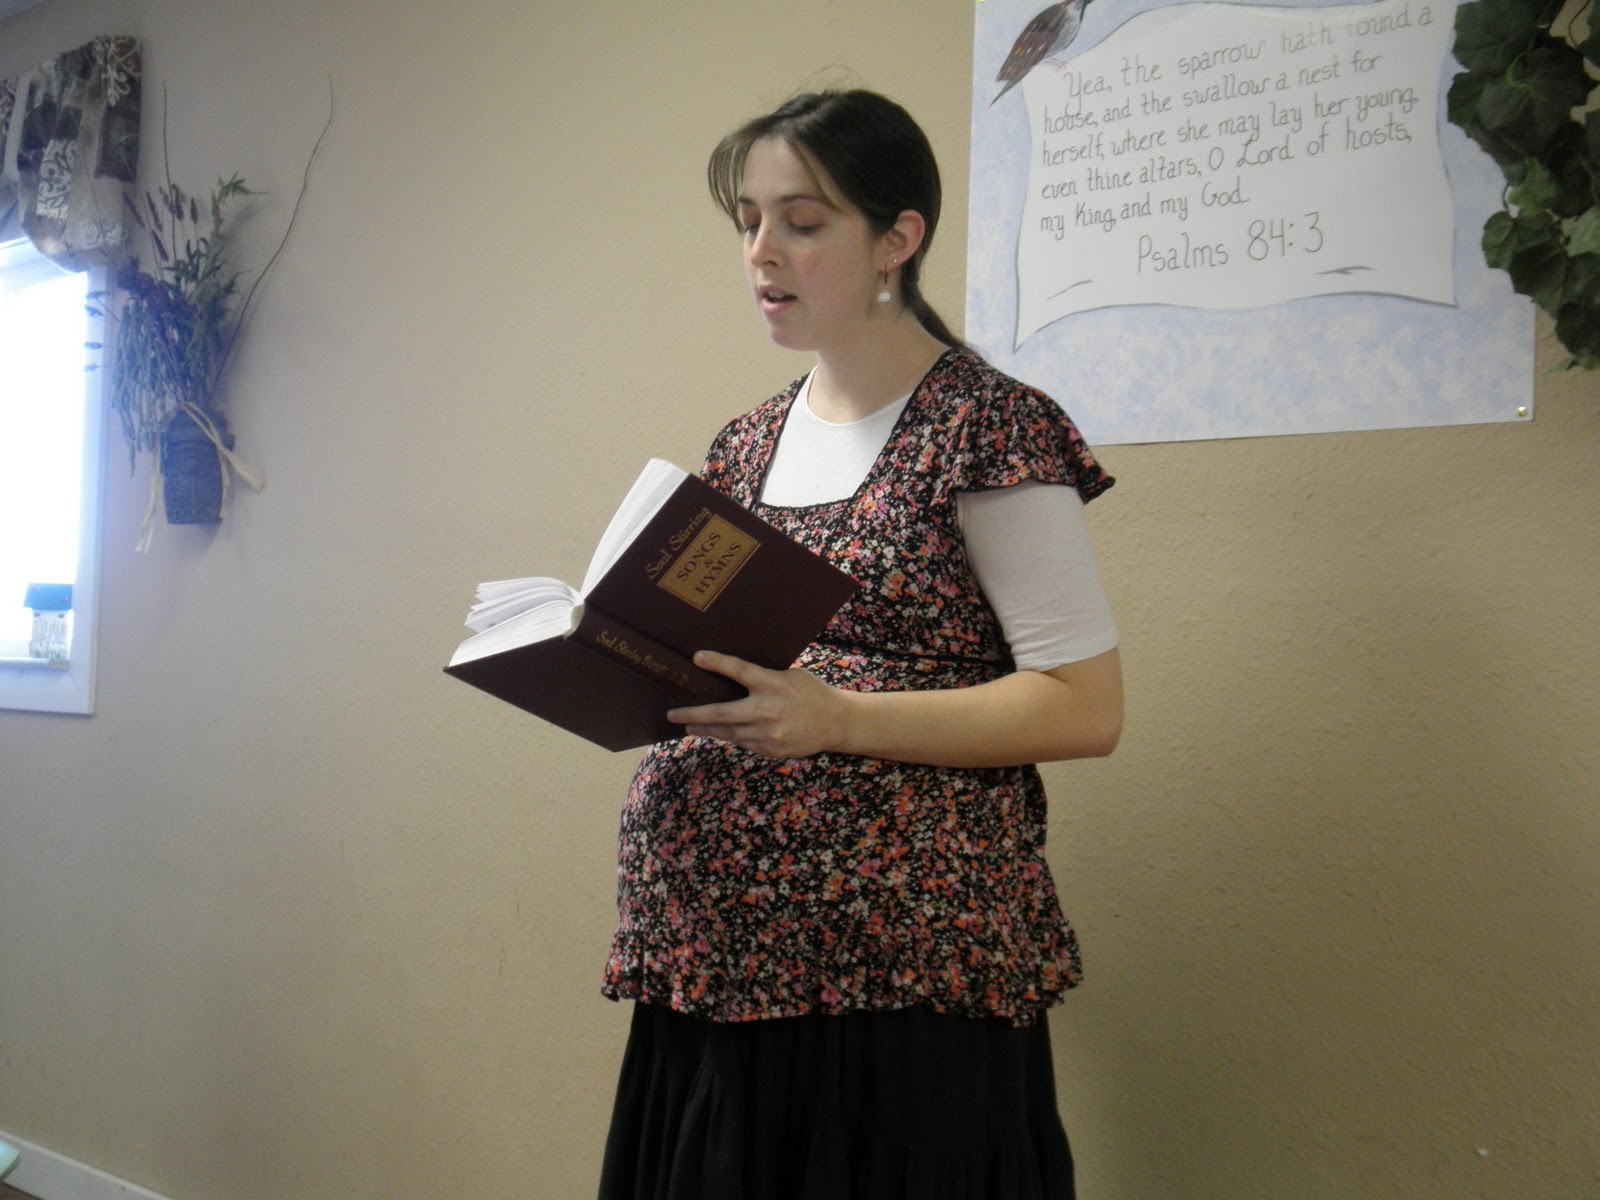
Katherine (on the left) gave the devotion and Miss Debra (on the right) sang "His Eye is on the Sparrow"


Joeann (Miss Debra's daughter, on the left) sang "Under His Wings" and Miracle (Skye's daughter on the right) sang "The Great Speckled Bird"  Miracle also made matching bird necklaces and earrings for the mothers and their mothers.  She also made nest pins for the favors.


When I host a baby shower, I believe it should be about the mother to be and a blessing to her.  We started the shower off with a prayer and blessing for the babies to come.  This post is already too long, so I'll put up some more pictures and then talk about the food and the cake tomorrow.  I have a great new recipe to share!  I hope you enjoyed!
This is me listening to Miss Debra's song, I almost cried she sang with such emotion and the words are fantastic!


For more information on the food go here:  http://missyscakesandaprons.blogspot.com/2011/04/his-eye-is-on-sparrow-food.html


Saturday, February 26, 2011

Powdered Sugar made from palm sugar

One of my biggest pet peeves as a cake decorator is not being able to make "real" buttercream with palm sugar.  My pastor's wife, Ebbye, told me how to make powdered sugar from granulated palm sugar or thot not, which is the same thing.  All you do is take 1 cup granulated palm sugar and one teaspoon corn starch and run it through the vita mix or food processor.  I have neither so I borrowed my neighbor's Vitamix and it worked great.  You can try a coffee grinder on the finest setting, but I don't know how that would work.  As you are processing the sugar be sure not to go too long or it will turn into a paste.  I made royal icing with it last night and it worked great!  Yeah!
Happy Baking!
Missy

Tuesday, February 22, 2011

Texas Baker's Bill by Lauren Kitchens


Texas Baker's Bill, My Official Statement by Lauren Kitchens on Monday, February 21, 2011 at 7:41pm


It’s never a fun thing to have to set the record straight, to be misquoted or misrepresented.

But this is where I find myself. An article about the Texas Baker’s Bill was recently published in the Houston Press and Dallas Observer, which unjustly claimed that I do not support the bill. That claim was false and careless, and the newspapers have posted corrections. But too little, too late.
However, all dark clouds have a silver lining, and this event has allowed me to be open and honest about a very delicate issue that I have not thought much about in the past.

The Texas Baker’s Bill is a cottage food bill going through the Texas Legislature that would allow home cake decorators in Texas to operate legitimate bakeries in their home. This bill has not passed the House yet, but support for and against is strong. Many Texas cake decorators have asked my position on this bill and it’s time they knew how I felt.

Upon graduating from college, I was faced with the question all young adults must answer. Now what am I supposed to do? I have always loved decorating cakes, and so I began making cakes out of my parent’s home kitchen.

After a few years, with no responsibilities of marriage or children, I took the plunge and got a Small Business Loan in the fall of 2001. I opened my commercial kitchen/wedding cake boutique in Dallas in the Spring of 2002. I was the beneficiary of perfect timing and opportunity.

In today’s climate, it is next to impossible to get a loan for any business. And with the economy still in the grip of recession, it seems foolish to drop $100,000 to set up a commercial kitchen with no guarantee of success. This should not be regarded as laziness on the behalf of those who do not benefit from the luck of my timing.

Home cake decorators find themselves in a trap. How do I make an income and further my skills as a cake decorator legally? It’s frustrating. I’ve been there. But I had the means to legitimize my business without having to pass state legislation. Most home bakers do not. And for this, I am extremely sympathetic.

Honestly, I had not read the bill until five days ago. And I took no public position on the matter. At first hearing, I thought the bill was a demand for home bakers to slip past the rules without going through the difficulties I went through as a start-up bakery, or the difficulties I go through as a bakery owner today. But upon reading the bill and talking to people all over the state, I see now that it fairly gives home bakers a legitimacy that they deserve.

The bill would enforce several restrictive demands on the home baker. It forces the home baker to become licensed and to pay a yearly fee, as well as a get food manager’s license. The bill forces the home baker to provide proper food labeling for any product they sell, which is something that I am not forced to do. They are even required to label their product as “made in a home kitchen that is not routinely inspected by a local health authority.”

The bill restricts home bakers on how they can sell their product and to whom they can sell it to. There is also a large portion of the bill devoted to whistle blowing, stating that they may easily be held accountable to the state health department.

Seems fair, doesn’t it?

For those in the professional world who ask, why should we legitimize home-based food service? My answer to that is simple. Why wouldn’t we support a bill that legitimizes and regulates food products? This bill sets standards that any food professional would hold important. And, I can say for certain that the Baker’s Bill poses no major competition for commercial bakeries. Not only does the bill set drastic limits on who the home baker may sell to, it also sets income limits. A home baker could never take on the load of a large professional kitchen with its employees, payroll, marketing costs, etc. These home-based bakers do not pose a threat to the gross sales of large commercial bakeries.

Where the client chooses to purchase baked goods is essentially up to the client. If the client feels that a home kitchen is unsanitary, they can choose a bakery to purchase product. In turn, if a client feels a commercial kitchen is unsanitary, then they can choose a home-baker to purchase goods from. It’s all about the consumer’s needs, and these consumers are protected in this bill. And there is plenty of business to be had by all.

I am, at heart, a home cake decorator. Home is where I found my passion and nurtured it. Home is where my roots as a bakery owner began. Fancy Cakes by Lauren is a successful small business in Dallas and I am in my 10th year as a proud owner. None of this would have happened if I had not started at home.

We live in a country of choices. We can choose who to vote for, what religion to practice, and we can make life choices that affect our families. The home baker has no choice but to work in the dark. They are screaming for legitimacy and need to be commended for seeking out regulation and guidelines under which they can be held accountable. The bill needs to pass not only for these important standards, but also for these people who dedicate their lives for the betterment of our art. And I am forever respectful of their struggle and efforts to get this legislation passed.

Here is my official stance:

My name is Lauren Kitchens. I am a Texas business owner and a professional in the food service industry. And I support the Texas Baker’s Bill.

Monday, February 21, 2011

Seven-Minute Frosting

This is the frosting I made with my pug dog cake that I could not decorate with, but it is some of the best frosting I have ever made, and super easy to make with palm sugar!  You can also use cane sugar, and maybe honey, although I have never tried that!  I found the recipe in an old cookbook.  McCall's Book of Cakes and Pies copyright date:  1965.
I found an updated version, a reprint here:


Seven-minute frosting

2 egg whites (1/4 cup)
1 1/2 cups sugar (I used palm sugar)
1/4 tsp cream of tartar (please do not skip the cream of tartar!)
1 tsp vanilla extract
(I had also added a 1/4 cup carob powder and a tsp peppermint extract)

1.  In top of double boiler, combine egg whites, sugar, corn syrup or cream of tartar, and 1/3 cup water
I do not own a double boiler, so I find a glass bowl that fits snugly in my biggest saucepan to make one.  make sure the boiling water does NOT touch the bowl!
2.  With portable electric mixer or rotary beater, beat about one minute to combine ingredients.
I had let the palm sugar "melt" in the water a little before I added the rest of the ingredients, this makes it easier to beat.  I had also doubled the recipe, and had frosting go everywhere!
3.  Cook over rapidly boiling water (water in bottom should not touch top of double boiler), beating constantly, about 7 minutes, or until stiff peaks form when beater is slowly raised.
It took me almost ten minutes of beating, I think it was because of the carob powder that it took longer.
4.  Remove from boiling water.  Add vanilla; continue beating until frosting is thick enough to spread-about 2 minutes.
     Makes enough to fill and frost an 8-inch or 9-inch two layer cake or frost a 9x13 inch cake.

This frosting would be awesome with a coconut cake!  Enjoy, I know I did!

Happy baking!
Missy

Thursday, February 17, 2011

Sourdough Starter

I have had some friends asking me about culturing your own starter for sour dough.  Making bread is something new for me, and of course I started with the hardest thing-sourdough!  The upside is that each loaf tastes better then the last loaf does!  My last loaf was actually pretty good, but it was too "short" or "flat" to make sandwiches.  I got this recipe from the book "Sourdough Basics" from the School of Homesteading".  http://www.cfeeschool.com/

Ingredients
purified water
stoneground organic whole wheat flour
clean, half gallon glass jar

Step1.  Combine flour and water
In a half-gallon glass jar, combine 1/2 cup flour and 1/2 cup water.  Cover with plastic wrap and let sit until you begin to see bubbles form on top.  It may take up to 3 to 5 days.

Step 2.  Feed the mixture when it bubbles, discard all but 1/4 cup of the mixture.  Add 1/2 cup flour and 1/2 cup water.  As the yeast continues to thrive, it will become frothy.

Step 3.  Feed the growing yeasts until the starter is very active
Once a day, discard all but 1/4 cup of the starter.  Feed the starter in this way until it can double in 4-6 hours.  The best way to keep track of the progress is to mark the jar with a permanent marker soon as you feed it.  Then you can more accurately tell how much it has raised.

Once it can double in 4-6 hours it is ready to use. 


Have fun, and just keep practicing!
Missy

Tuesday, February 15, 2011

Pug Dog Mold Tutorial

Decorate the Cake sent me a silicone mold for a pug dog to try out.  It is the cutest mold, and so easy to use.  My husband is used to it taking me a while to sculpt things, so he looked over and was surprised I was already finished with the dog!
First I printed off a picture of a pug dog to make sure I got the coloring right.  Then I took some black fondant and put it in the areas where his nose and ears are.  I used a fondant stick with a ball at the end to push the fondant into the crevices.  Remember to scrap away the extra fondant from around the dog's features.


I took half my fondant and added a tiny bit of copper to the white.  I added a very small amount of brown to the other half. Then swirl the colors sparingly (you want it to look like the markings from a dog). I took a tiny part and swirled some black with it for the tail.  Put some vanilla onto the black pieces already in the mold to ensure that they stick.  Make sure you have a smooth oblong shape and then press into the mold.  Then you gently pop out your dog.  Very easy and fast!  I love this mold!  I then made some dog bones and a red ball for the cake.  I also took some left over black and rolled into a small ball, then pushed my ball end of my fondant stick into the middle and shaped them into bowls. (I forgot to take pictures of this part) I cut up a Wilton candy melt and put it into one of the bowls for the dog food.  I then colored some frosting blue for the water bowl.  I would have used some blue piping gel if I had some.
I would not suggest trying out new frosting recipes when decorating a cake, because although the new frosting was delicious, I could not decorate with it!  I'll post the recipe in a few days for you!

Although the frosting looked terrible, I feel the accents were very cute!


You can go here http://www.decoratethecake.com/store/Default.asp to buy this cute mold!  Be sure to look around because they have a lot of cute and elegant molds to use!
Happy Baking!
Missy

Friday, February 11, 2011

Interview with Tammy Strobel


As ya'll know, I am still playing catch up with several posts I have planned.  I interviewed Tammy Strobel who placed twice in the Oklahoma Cake Show.  She gives some great tips and hints on how to prepare for a cake show!

1. How long have you been decorating cakes?
I’ve been decorating about nine years off and on. I took some time off a few years ago due to health reasons. I don’t have a business. I only make cakes for family and friends.

2. What kind of classes have you taken?
I got into cake decorating when my mom signed me up for the Wilton class and I and was hooked. I did all three Wilton classes. I’ve taken some one day classes locally and thru my cake club. I haven’t gotten to do any big name decorator yet but I hope to do Michelle Bombarito when she’s in Dallas for the Sugar Wonders show next year.

3. What divisions of the competition did you enter?
 I entered the Semi-Professional Division Confections and Couture Jewelry categories. I haven’t gotten brave enough to try the Grand National Wedding Cake Division but some year….

4. How did you place?
 I received a second for Confections and a third in Couture Jewelry.

5. What steps did you take to complete your pieces?
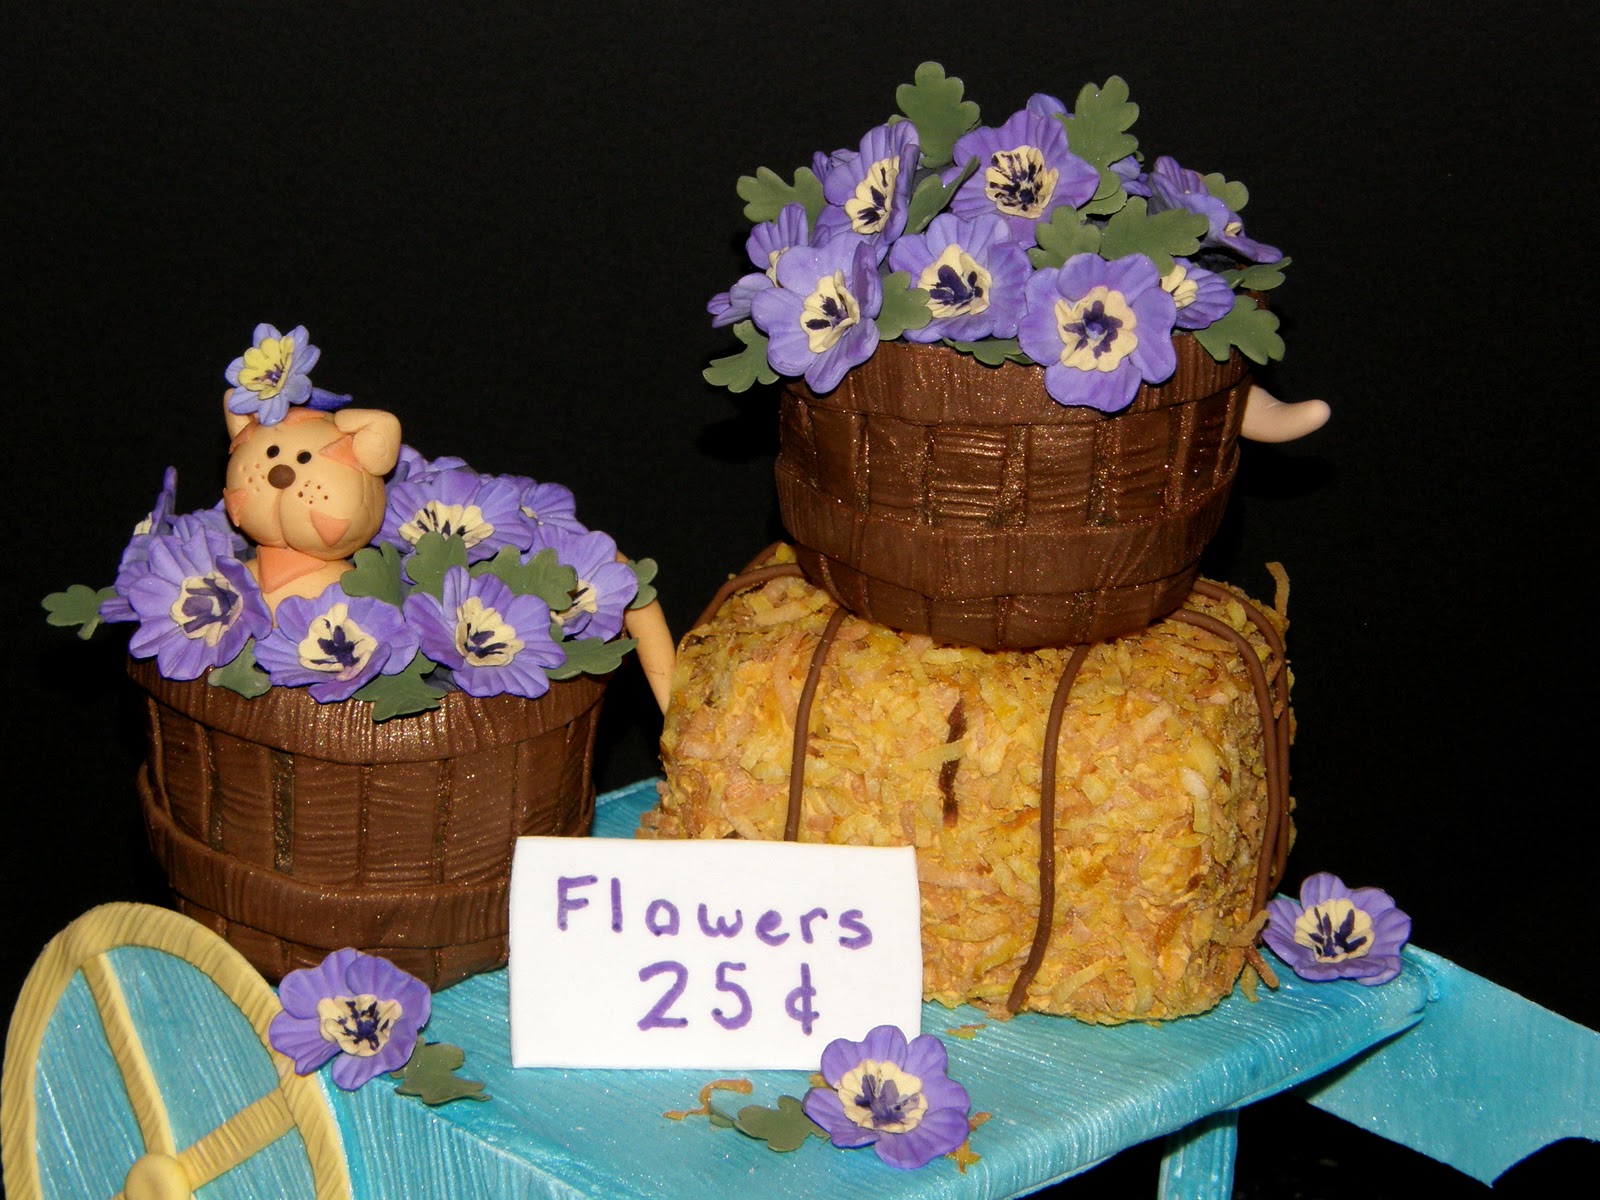
The first thing I did was read the rules to ensure my entry would qualify to be judged. This was important in the jewelry category because you were required to do some piping if you used a mold. I think some competitors lost out because they only molded their entry. Then I sketched out (very badly) my design and make a list of the necessary supplies. Unfortunately, I am a tax accountant and this is the busiest time of the year for me so working ahead was not really an option and I was using real cake. I baked my cupcakes about two weeks in advance then started on the gumpaste flowers. Purple is very bad about fading so I kept them in the dark until I put them on the cupcakes, then kept them covered until competition. The flowers took the most time as they had two layers of petals and were painted and dusted for highlights. The baskets where made using chocolate fondant and a strip cutter then simply laid across the iced cupcake to form a basket. Flowers and leaves where attached last.


6. What is the jewelry made of?
The jewelry is gumpaste from a mold with piped royal icing lace points. The gold was an airbrush color and the greens and reds where painted on using petal dust and Everclear. The jewelry box lid was done using free hand brush embroidery and painted with petal dusts. Small pearls are hand molded and the ones around the mirror were done with a mold.
How long did they take to make? There’s kind of a story that goes along with this entry. I ran out of time and only had a few items made for my original design so I was able to pull together left over items from former competitions to make this entry. The jewelry box lid was a hex side design from another cake I worked on for a competition but didn’t finish. The jewels were made for the same cake. The roses, leaves, and pearls were extras from a wedding cake entry last year. The gumpaste rose was from a training session I was working on for a friend. The lace points were made about a year ago as practice and I had just enough to go around the jewels. So I looked around at what I had and was able to pull together an entry in about five hours. I do not recommend this method!!


7. What are the cats/flower cart made from?
The base of the cart was foam board covered in fondant with dowel legs covered in fondant. I made a template for the sides of the wagon, used round cutters for the wheels, and airbrushed a French blue. The hay bale was made of rice cereal treats covered in royal and rolled in coconut that I dyed 4 colors of yellow/brown/beige and mixed together. The cats were hand modeled from fondant.
How long did it take to make? This entry took about 4 days to make due to the amount of time necessary to make the flowers and let the cart dry.

8. What did you learn from this competition?
Never throw anything away!! I learned to be very creative. Found a new way to work with my impression mat and improved my painting and figure modeling skills.


9. What did you glean from the judges comments?
 I received mostly positive comments from the judges. They do pay close attention to the colors used and how cleanly the design is executed. It is also very important to read and follow the rules.

10. Is this your first competition?
I’ve competed about six times between the OSSAS and the Sugar Wonders Cake Show. I’ve won two best of division ribbons and Best of Show at the 2009 Sugar Wonders Cake Show.

11. Any thoughts or tips?
 I think competition makes me a better decorator. I try new techniques and try to move outside my comfort zone. I think clean and neat always appeals to judges. Show a range of different techniques but make sure you have a certain level of mastery before putting them on a cake. And remember, the board counts. I saw many very well executed cakes at Tulsa that did not place and I know it was because they were on foil covered boards or poorly covered boards. One competitor told me her judging notes actually said that.


Sugar Wonders is also hosting a cake competition on April 30, 2011. We have commitments from Michelle Bombarito, Bronwen Weber, Lauren Kitchens, and Dawn Parrott at this point. All are Food Network Cake Challenge winners! There will be more info on our website in the near future.

Do you offer classes, have a bakery, blog/website or anything you would like to talk about? I don’t have a bakery or do classes. I do demonstrate for ICES and Sugar Wonders and I will being doing a demo for the Dallas Cake Club in a few months.

For more information go here: http://www.sugarwonders.com/home.html
Tammy, thank you again for the time to answer all of my questions!  If you have any questions, be sure to leave your email address so that we can contact you!

Missy

Friday, February 4, 2011

Free Apron Pattern

One of the new blogs I follow has a free pattern for a very cute apron.  The top part of the apron is gathered on the top and bottom, producing a very cute effect.
Be sure to go here for the free pattern:   http://artgalleryfabrics.typepad.com/weblog/2011/02/time_to_spice_it_up.html#tpe-action-posted-6a00e553bbe52e88340147e24d2124970b
I printed mine out and cannot wait to make one!
Happy Sewing!
Missy
"Oh taste and see that the Lord is good: blessed is the man that trusteth in Him." Psalm 34:8