The theme of the baby shower was milk and cookies, so I wanted to stay with the theme of the baby shower. I had seen some very cute pregnant mommy cakes from
pinkcakebox.com and I wanted to try to make one of those. It was definitely not very easy. It took me 4 1/2 hours to make my pregnant mommy!
LOL! I made her on Tues. night so that she would have time to harden before Sat. This is how I made her:
My husband told me that I shouldn't put a picture of a naked pregnant lady on my website!
LOL I told him this was not the same thing, it's a tutorial! :) First I rolled a thick sausage for the body. Everything I read said to make sure it was not too big or you would make her fat. I flattened my sausage some because torsos are not round. I made a belly and her boobs out of round balls. M
ake sure you place her boobs up higher, I had placed them too low and had to move them later. I stuck a piece of spaghetti through her belly to keep it attached. I used lemon extract to attach everything because it makes the fondant taste better. You can also add some directly to the fondant and knead it in with the color. You can also use water to attach things. I used a tiny drop of copper to make her flesh color.
Next I made her legs. I made two sausages for her legs and bent them at the knees and at the feet since she was sitting down. Notice that I have her sitting on the pan that I will be using for the top layer? I wanted to make sure that I made her the right size. Notice how I flattened the top of her legs? I did that so I could stick them under her and attach them with water. 1. I made them too skinny 2. I put too much water on them when I attached them. So she lost a leg and I had to do surgery.
I had to add extra fondant around her belly and bottom to try to keep the legs attached. This made her look fat when I got done. Next time I will make her legs bigger at the top to begin with to avoid this problem, because I still lost another leg after I had finished with her dress. I attached it with frosting when I assembled the cake together.
I never did find a tutorial on how to make her clothes, so they didn't turn out great, but here is what I did:
I first tried doing one piece for the dress, but that did not work. Here is the picture of my mistake, I forgot to take a picture of what I did for the skirt. So I took some fondant and rolled it out and I used my ball tool and sponge to thin out and ruffle the bottom some. I then wrapped it around her belly and under her bottom.
I wrapped it around her like I would fabric and smoothed it down. I tried to make sure her belly showed!
LOL
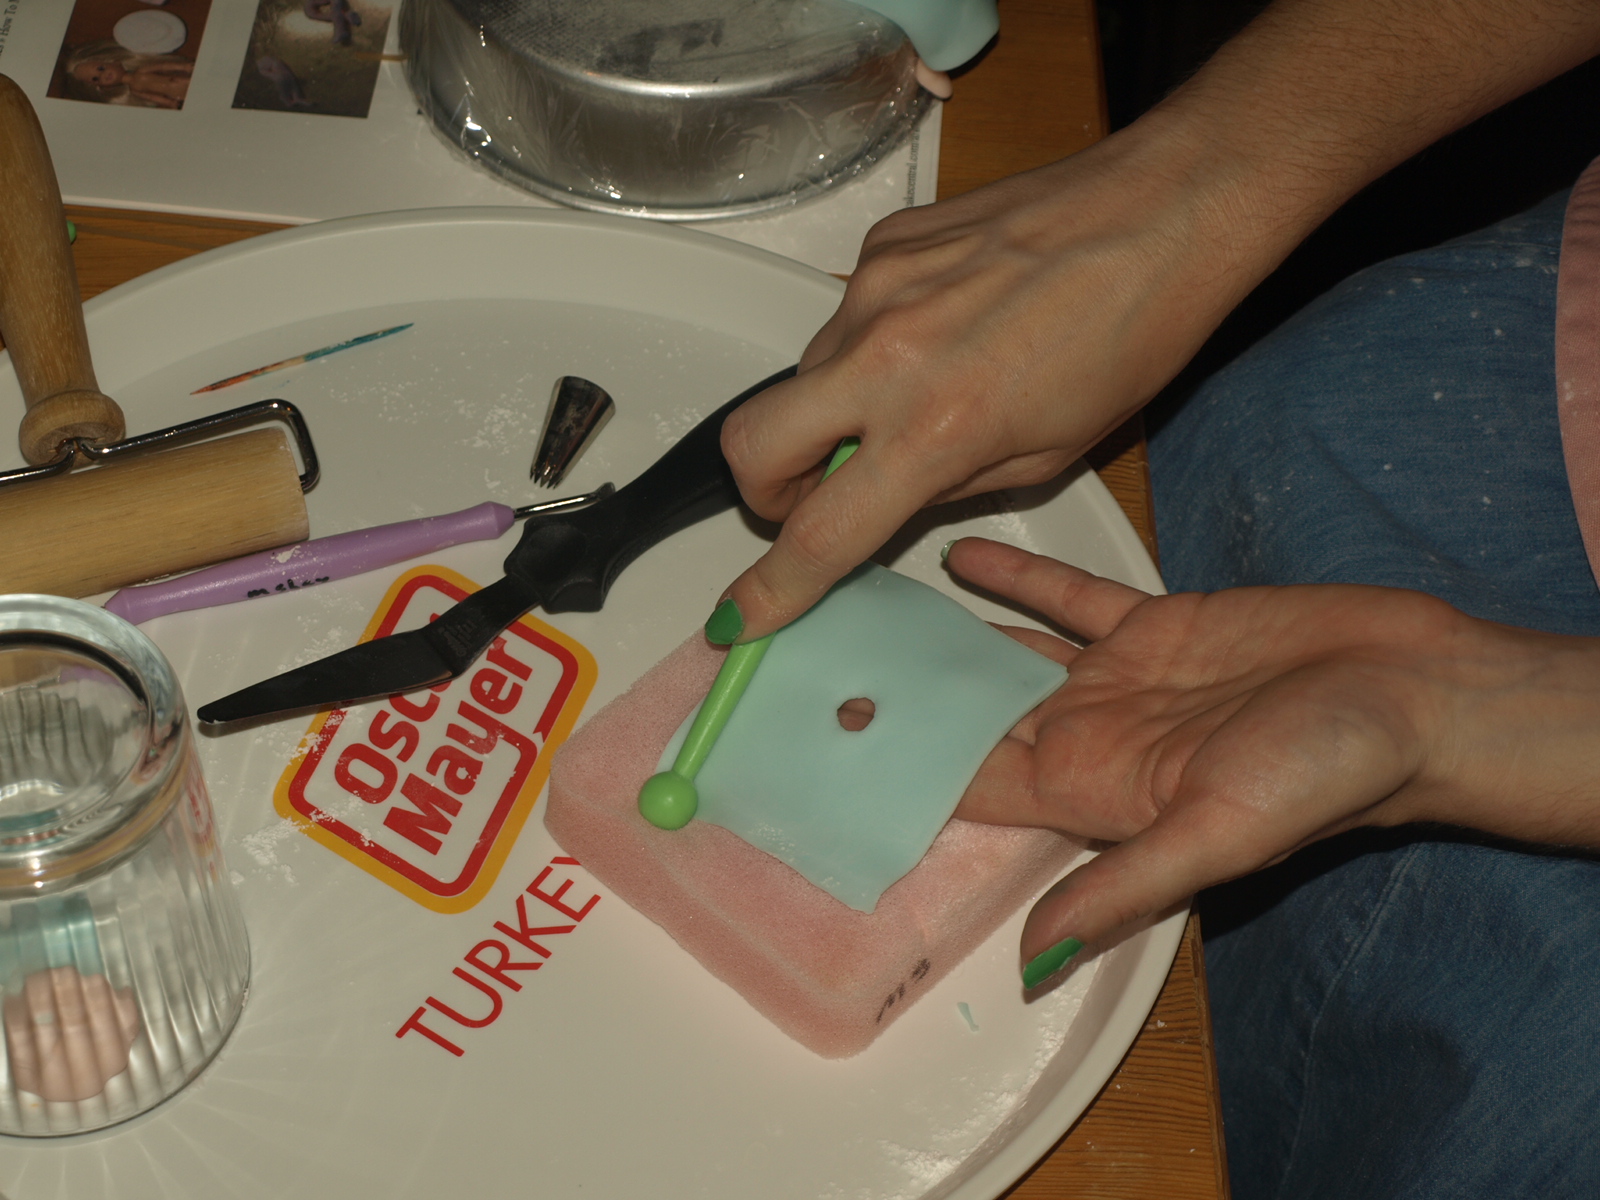
For her top I cut out a square and used the bottom of one of my tips to make the neck hole. Using my ball tool I thinned the bottom of her shirt and then I tried to cut it with a wheel thingy from Wilton, but it didn't work. So I grabbed my scrap booking scissors, and they worked great and gave it a nice pretty scalloped edge. :) (BTW - do you see my green fingernails?
LOL) Make sure you cut your shirt out bigger just in case so you don't have to do it twice like I did!
Notice in the upper picture how I just placed the square on her for the shirt? I should have smoothed down the front some more to help accentuate her belly. I should have also cute off the shoulders there because it looked like she was wearing shoulder pads. I smoothed down the sides with water. I rolled two more sausages for the arms. I stuck a piece of spaghetti through her shoulders to hold the arms on with. The arms were covered with sleeves so next time I will make them a tad bigger at the top for more support. I also need to work on the sleeves and hands, they were terrible. I covered the hands with cookies.

I was really stressed about the face and forgot to take pictures as I made it. I wish I had taken a picture of the first face I had made - she was scary looking with a big black smile and huge eyes! My husband took one look at her and told me I would have to make another one, and he has never told me I needed to redo something before, even when it turned out awful! First I rolled a ball for her head and stuck it on a piece of spaghetti sticking out of her body. Then I took a toothpick and made a hole for her mouth and then stuck a piece of leftover pinkish reddish fondant in her mouth with my pinkie nail and opened it up a tad

bit more. Using my smallest ball tool I made two small holes for the eyes and put two tiny balls of dark brown in there. (Kristi has green eyes, but my husband didn't think the green would show up very well). I dipped a toothpick in black gel food coloring to draw on 2 eyelashes in the corner of each eye. I took a small piece of flesh colored fondant and rolled it into a ball for the nose. I used a q-tip dipped in pink luster dust for the cheeks and put some in her mouth. I used leftover brown to make her shoes.

For her hair, I took a small square and cut fringes in it for her bangs. I put those on first. I had used chocolate fondant mixed with white fondant to make the rich brown color of her hair. I rolled it into an oval ball and just flattened it out with my hands. I used an angled spatula to make the lines in her hair. I had to move her when I baked the cake and I just happened to have the bench that I put her on. Tomorrow I will give you the recipes for the cake, totally from scratch strawberry cake, with strawberry cream cheese filling and fluffy carob frosting. I will also tell you how I decorated the rest of the cake.
I also made cookies and milk for the cake to go with the theme of the shower. I made a platter for the cookies out of some leftover fondant, then I rolled tiny balls of light brown fondant and
poked them with toothpicks and used lemon extract to attach them in a pile. Then I filled in the holes with black food coloring on the end of a toothpick. I molded the glass and milk bottle free hand. You can go here to learn how to make the rest of the cake:
http://missyscakesandaprons.blogspot.com/2010/06/milk-and-cookies-cake-plus-recipes.html
Thank you for listening, and happy baking!
Missy


No comments:
Post a Comment