"She looketh well to the ways of her household, and eateth not the bread of idleness." Proverbs 31:27

Wednesday, September 26, 2012

Yo-yo's the center of the Dresden Plates

Happy Fall ya'll!  I love to say that!  LOL  I wish we had some cool days here in TX, but it is still in the high 90's!  Yuck, give me cool weather any day!  Don't forget to enter my Birthday giveaway for a free quilt pattern here.   
For my Dresden Plates, I decided to make yo yo's instead of plain circles for the inside of my plates.  To see how I made my plate you can go here.  Yo yo's are pretty easy to make, and fun.  I took them to church with me on Sunday.  Instead of having an early morning service and then a late evening service, we have both services close together.  We have a potluck after the morning service and then evening service at 3.  That gives us time to fellowship between services.  So, I'll use that time to work on my hand stitching while I talk with my friends, I showed three of my friends how to make yo yo's, it was fun.
I decided to use my striped material for the center.  I cut a template out of card stock, I made the circle 6 1/2 inches round and traced it with my fabric marker.  My rotary cutter was too big to use, so I cut them out with scissors.

After the circles are cut out, I just hand sew a running stitch around the edge with the wrong side of the fabric facing me.

Sorry about the shadows.  Then I just pull the centers together, the same as if you are gathering a skirt.
I did something a little different here.  Since I wanted to make sure everything stuck together when it was washed, I took a piece of stitch witchery and put it in the middle of the yo yo between the two fabrics before stitching the opening closed.

I then stitched the center closed and down in the middle of my plate.  (I know, the center is "off")
I then ironed my yo yo down so the creases would look nice.  After ironing it, I put more of the stitch witchery under the yo yo around the edges, to give it more staying power.  Then I took a wet wash rag and laid it on top of the yo yo, this is what will bond the stitch witchery to the fabric, and sat the iron on top for 10 seconds, this will do the piece on the inside of the yo yo as well as the pieces around the outside edges.
The yo yo is now stuck on with the stitch witchery.  But I do not trust it to hold by itself, so I tacked down the edges, I already tacked down the center of the yo yo when I attached it to the block.  The blue is the button thread.
I went through my buttons and had some that were the same green!  Yeah!
I decided to use the turquoise thread from the blanket stitch to sew the buttons down with.
That is how I made my yo yos to finish off the plates!
I did find a youtube video on how to make yo yos if you would like to watch it.

I hope you are enjoying the weather where you are, I'm stilling praying for some cold weather.
Missy


Monday, September 24, 2012

A birthday giveaway!

My birthday is on Sunday and I will be 39 years old.  I want to give one of ya'll a birthday gift from me!  How about a quilt pattern?

http://quiltpoetry.com/

This is Celebration by Jane Spolar.  She has some free downloads for placemats and napkins here.
Since birthdays are usually a celebration, I thought it would fit pretty well!

All you need to do to enter is leave a comment telling me how you follow my blog and what kind of quilts you like to make.  I am an old fashioned kind of girl and love the old patterns.  For example the Dresden Plates, Grandma's Flower Garden, Martha Washington's Flower Garden and Wedding Rings, etc.
If you share about this giveaway you will get a second entry.  Just leave me a second comment telling me how you shared.  Be sure to leave me your email address if you are not sure whether you are a no-reply blogger, if you are signing in as anonymous especially!
Did you see my new background?  That is the quilt my Nanny made!  My husband showed me how to crop the photo and make it smaller.  So I followed his directions and then uploaded it under templates in Blogger.  It was so easy once he showed me what to do!  I am so excited!
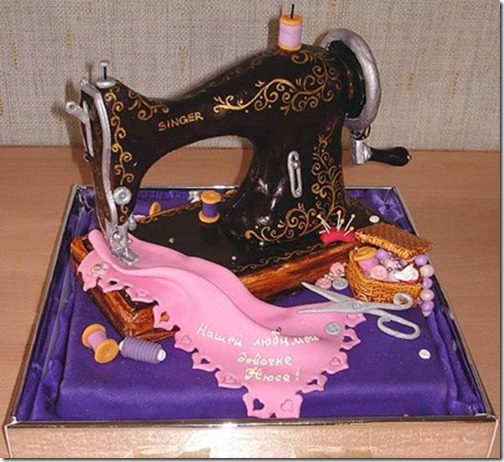
I also want to share with you a birthday cake I would love to get for my birthday.  I never get a birthday cake, I'm always the one making them!  LOL My favorite kind of cakes are carrot cake, spice cake, orange cake, lemon cake, etc. I love anything with nuts and really want to try the pecan pie cake or the butter pecan cake.  Those recipes are here.
http://www.cakewrecks.com/home/2011/9/4/sunday-sweets-getting-crafty.html
 Just look at these cakes!  I have a lot of ideas on my Pinterest board.
http://smallthingsiced.blogspot.com/2010/08/vintage-sewing-machine-cake.html
There are really cute cupcakes to go with it!
 甜品-美食-蛋糕  美食也□*■■*□疯狂
http://www.digu.com/pin/tjzpnjxwtnya
singercake
http://quiltville.blogspot.com/2012/06/oh-my-goodness-gracious.html?showComment=1340219069022
These are just a few of the awesome cakes I've seen!  Well, I said I never get cake, one time my husband did try to make me a birthday cake.  He wanted to make me a checkerboard cake, where the inside of the cake is checkerboarded with two different flavors.  He did peanut butter and chocolate (my favorite combination of flavors!) and he bought the pans and the cake mixes and made my cake with 7 cake mixes for just the two of us.  That was a lot of cake and a very special cake.  I have such a sweet husband!  If I could throw myself my own party, I would do a masquerade ball, but without the dancing.  Can't you just see it?  A fancy ball gown with a fancy mask?  That would be so much fun.  Maybe for my 40th!  LOL
Okay, that's enough of that!  Don't forget to enter my giveaway, I will draw the name on Saturday sometime.  My husband and I have a date that day, so I don't know what time I will draw.  I'll announce the winner sometime on Sunday, probably after church.  Be sure to have your comments left by the end of Friday!
I already know what I'm getting for my birthday from my husband too!  A handcrank sewing machine!  I am so excited!
Have a great day ya'll!
Missy

Friday, September 21, 2012

Homemade cat food

I make my cat's own cat food.  The store bought stuff is so bad for them, with all the corn product and meat by-products, etc. All the cat food from China that kills your pets also.   Not to mention how expensive it can get with six cats and I can't afford the organic, healthy stuff.  The best diet for them is raw meat, but that is not convenient at all, and I only have two cats who will eat raw meat.
Squeeky is my loner, but Pippi is the only one allowed to sleep by her.
Pippi loves everyone and thinks everyone should love her too.
So for the cat food, I don't do any measurements.  I boil a whole chicken on low for about 1 1/2 hours, take it out and let it cool so I can de-bone it.  (A crock pot would probably work too.)
While it is cooling I throw 1-2 pounds of hamburger meat in the boiling water. I would also recommend some livers too, if you are using frozen fish, add it now too, just remember that all fish to be cooked has to be de-boned because cooked bones will choke them.
It takes between 15-20 minutes for the hamburger to cook.  I use a potato masher to separate the meat.  I throw in 2-4 cups of oatmeal as a binding agent, depends on how much water is in there.  You don't want too much oatmeal, but just enough to hold it together.  Do NOT use rice, they poop it out without digesting it.  (sorry kind of gross)  Cook for about another 5-10 minutes.  It will thicken in the fridge too.  De-bone chicken and cut it up and add to the food.
After letting it cool down at room temp., I add canned fish instead of frozen.  Sardines and salmon are both full of nutrients a cat needs.  Sometimes I add canned mackerel if money is tight.  I wait for it to cool down so the bones don't cook and become brittle.
Sometimes I add yogurt for the probiotics, and finely chopped broccoli will give an indoor cat needed nutrients, sometimes I will also add half a can of pumpkin which is a super food.
Tiger, Pippi and Muffin
Some of them would not eat it at first, but now they all eat it.  I try to have poultry, red meat, and fish in each batch.  Just use whatever is the cheapest meat you can find.  This will last my 6 cats 1-2 weeks.
Disclaimer - I do keep cans of cat food in stock in case I run out, and dry food for days I will be gone all day.  Since this is fresh food, you can't leave it out all day.  If you have less cats, go ahead and put some in the freezer.  Muffin and Pippi love to eat salad, weird I know!
See, everyone loves Pippi!


Precious, Muffin and Pippi
Pippi does not like to share her basket, so if she can't get Muffin to move to the almost too small for him purple bed, she will just lay on top of him.  It's a hoot to watch!
If you make your own cat food, please share!
I am linking up at Sarah Did It, Feline Friday.  Be sure to stop by and link up your favorite cat post!
The crazy cat lady,
Missy!

Thursday, September 20, 2012

New/Old Sewing Machine

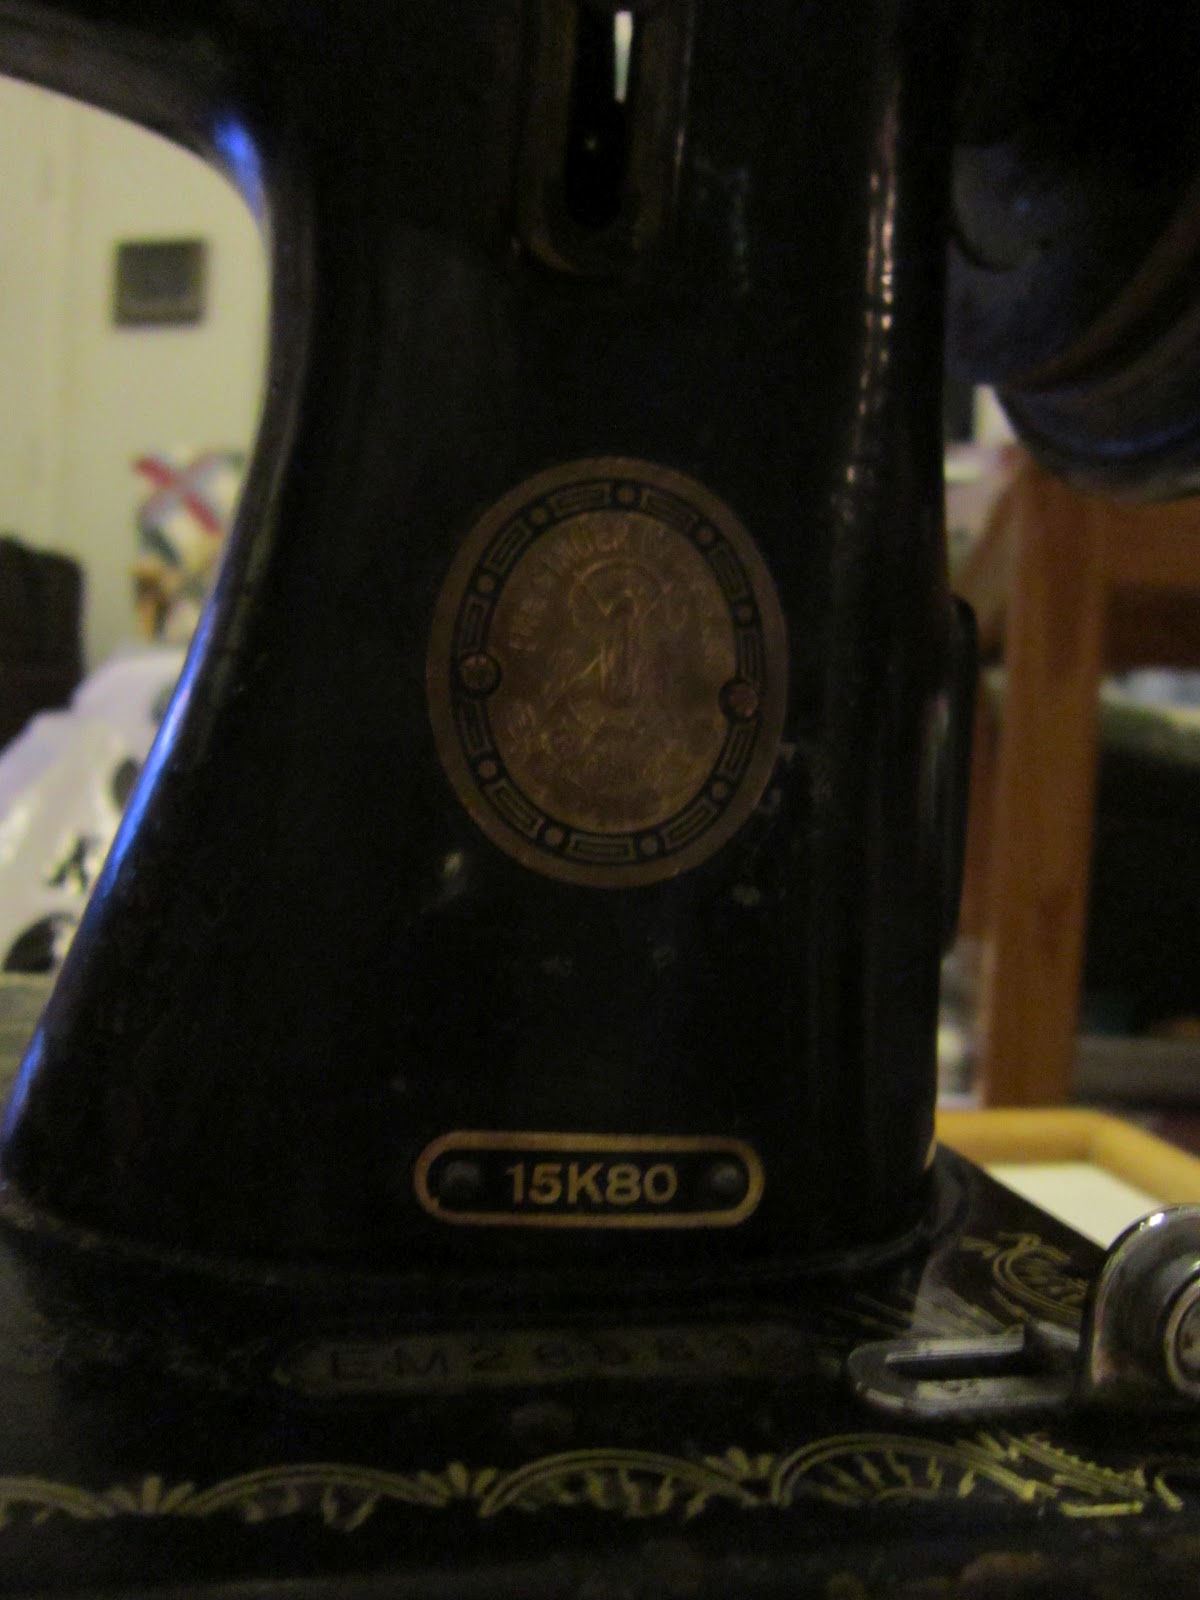
Look what I found at a thrift store for $25.  It's not for me, it's for a friend who is wanting a hand crank sewing machine for her daughter.  It is an old treadle head that needs to be converted.  It is a Singer, Serial number EM285899 and model number 15K80.  If you know what it is called will you please let me know?
 As you can see it was pretty dirty and rusty.


 I love the bird on it.  The decals are in pretty good shape.
 After hours of cleaning, this is what it looks like now.
 All cleaned up and pretty.
The varnish or finish on it is peeling though, I'm not sure what to do about that.  I'm tickled with how shiny the silver is now, I love Gojo, that's what I used.  This machine uses regular bobbins and needles.  We got the hand crank in the mail and are now waiting on the spoked wheel to convert it.  A hand crank is a great way to teach a child how to sew because they control the speed of the machine, so it is a lot safer.
Update:  Captain Dick of treadleon.net says that it is a "That is a Model 15 of older vintage.  This one is sometimes called the RAF model.  It came along when other 15's were getting reverse, but it didn't win the lottery, so it has stitch length but no reverse, like the 15-30's."
Thank you Captain Dick!
Missy

Tuesday, September 18, 2012

Finished Dresden Plates!

I finished all ten of of my Dresden plate blocks!  I still need to do the ten Dresden butterflies though, so I guess I have half of my blocks done!  This was my first time to do applique, so I had a LOT to learn, I still do!
First I cut out 20 - 16 in. background backs.  Ironed them twice, then gave up and ironed them again using starch.
First you need to find the center of the square by folding it in quarters, and then pressing down.  When you open it, you will have your center marked.
I bought a fabric glue stick to hold my plates down, I ran out by plate 8 and finished them up using a regular glue stick.  I glued each wedge.  You can also use pins to pin them down.
Next I centered the plates and pressed them down.  Line up the wedges evenly on the lines.
I did not have time to hand applique it, so I did a blanket stitch with a bold color (turquoise) to outline the outside of the plates.  Line the needle up on the edge plates and select the blanket stitch on your machine.  If you do not want your stitch to show, you could use a straight stitch with invisible thread.
I would just leave my block in the machine when I had to stop and do other things, of course Pippi thought it was a perfect spot to sleep!
Here is a close up of the blanket stitch when it was done.  I really like the way the outline turned out.
I'll do a tutorial on the centers in my next blog post.  I'm hoping to get started on the butterflies today.  Muffin, Boots, and Tiger had to inspect my blocks.  Pippi kept trying to grab the buttons and run off with them, so she is not in any of these pictures.


If you would like to see how to make the plates go here.
I'm spending the day with a friend sewing, but first we are going to half price day at Goodwill.
Have a great day ya'll!
Missy
"Oh taste and see that the Lord is good: blessed is the man that trusteth in Him." Psalm 34:8