"She looketh well to the ways of her household, and eateth not the bread of idleness." Proverbs 31:27

Showing posts with label Cake Tutorial. Show all posts

Monday, July 2, 2012

Wedding Cake

I was busy making a wedding cake on Saturday.  I just decorated the cake, the bride's mother added the real flowers.  My frosting started sagging because of the heat and made the heart lopsided, and I had to add designs to the heart to cover it up.  I also messed up on the frosting.  The recipe I always use calls for 2 lbs of powdered sugar, I use Wilton's recipe, I wasn't sure where my recipe was, so I looked online and got it from the website.  After I decorated it, getting mad at my frosting for not cooperating, fixing it and then delivering it.  I realized what the problem was.  The recipe online was halved, for 1 pound, and I put the whole bag out of habit, which was 2 pounds.  I hope the icing was not too sweet for them!
She turned the pan upside down under the board to give it some height and put greenery around it.  She also covered the board with freezer paper which looks really nice, I've always used aluminum foil but am going to start using the freezer paper.She also suggested putting a tablespoon of flour in the frosting to cut the greasiness taste.  I hope they enjoyed the cake!
Saturday night I made 66 cheesecakes in cupcake pans to sell at church.  I sold 51, gave a few away and had 7 left over for me!  The week before I sold carob cupcakes.  I'm saving up for something special I'll tell you about later.  That is all the big baking I have had planned.  I'll be taking a break from baking for about a month.  It's hot in my house!
I hope you had a great weekend!
Missy

Monday, January 9, 2012

Quick Cake Decorating

My friend Clarrisa's birthday was last week.  I wanted to make her, her favorite cake but I did not have very much time this weekend.  I told you what my Friday was like in my last post, http://missyscakesandaprons.blogspot.com/2012/01/whoops.html .  Saturday was pretty busy too, payday weekends are always like this!  She wanted my honey whole-wheat pound cake http://missyscakesandaprons.blogspot.com/2010/05/honey-whole-wheat-pound-cake.html with real buttercream made with palm sugar.
I baked the cake late Saturday night and let it cool overnight.  Sunday before church I grabbed the buttercream I had leftover from her twins' cake http://missyscakesandaprons.blogspot.com/2011/12/twins-birthday-cake.html to decorate the cake with.  I had about 30 minutes to get this cake decorated!
I grabbed the "white" buttercream(it is tan from the thot not powdered sugar I used) and added a tad (it glopped in there and made it way too soft)bit of milk to thin it out.
First I put the blue frosting in the middle.
I admit that I was in a hurry and did not level the cake.  That has always been a bad shortcut of mine.
I used a tip 3 and piped squiggles on the edge of the cake.
I added another layer of squiggles and did this all the way to the center.  Do you see the crater from the icing sagging because it was too soft?  Lesson learned, next time put the milk in another container BEFORE pouring it in your icing!
This will give you a quick, simple, pretty cake.  Notice I put a towel down on the table before decorating?  The reason is two-fold.  First it makes clean up a lot easier, I just throw the towel in the wash.  2. I did not have to pick up my cutting mat and quilting rulers before I started.
If you like this concept but want to make it fancier.  Use two different colors and put roses on top.  Here are some I made years ago when I was still new to this.

It looks like I used a tip 5 here instead of a tip 3 here.
I miss making roses, the next birthday cake I make will have roses!
Go make yourself a an easy cake!
Missy

Sunday, December 11, 2011

Twins' Birthday Cake

All Smiles!

Here's a picture of me serving my cake today at church.  Do you see the ugly plastic gloves?  LOL

Aaliyah and Aaric turned 15 today.  She wanted two fondant figures of her and her twin brother.  I started out with molding rice krispies treats into the shape of their body.  I used a thick straw through each body to hold everything together and stick in the cake.  I didn't have any brown food coloring, so I took some almond bark, melted it, added some corn syrup, and added it to my fondant to make black skin.

I think making clothes out of fabric is a lot easier than fondant!  I can't make hands, so I needed to figure out a way to hide their hands.  Aaliyah likes ponchos so I used one to hide her hands.  I wasn't sure how to make his hair, so I took a new sponge and dipped it into black food coloring and then sponged it onto his head.


To hide Aaric's hands, I had him hold the fondant 15 that I made using a mold.
Aaliyah wanted half the cake pink and the other half blue.   I made the candy figures from gumpaste molds I got from here:  http://www.decoratethecake.com/store/WsDefault.asp?Cat=SiliconeMolds&Sub=107&isThumbs=Yes&Thumbs=100
 
The odd colors are from the thot not powdered sugar I made.  You can get the directions here:  http://missyscakesandaprons.blogspot.com/2011/02/powdered-sugar-made-from-palm-sugar.html  I just used a basic buttercream recipe and added salt to cut the sweetness and some almond extract which gave it a bit of a maple taste.
I made a 1/4 sheet cake and to help it to cook in the middle I greased a biscuit cutter and put it in the middle to act as a heat conduit.
Here is a close up of Aaliyah on the cake, she is surrounded by cupcakes.
Here is a close up of Aaric.  I didn't mean to make their noses so big!
I had a lot of fun making this cake, even though it took me five hours to make the fondant figures!

I hope you enjoyed my cake!
Missy

Wednesday, August 24, 2011

Monkey Cake

My friend was having a baby shower and I offered to make the cake.  I asked her what kind of cake she wanted, thinking flavor wise, and she told me she wanted monkeys and did not care what the flavor was.  So of course I had to make a banana cake (recipe here: http://missyscakesandaprons.blogspot.com/2011/03/delicious-banana-layer-cake.html )  I doubled the recipe which called for 3 total cups of sugar, but I only had 2 cups of palm sugar left.  With the sweet icing it tasted just fine though.  Banana cake was firm enough to hold up in a 3-D pan.  I also made peanut butter cream cheese frosting (you can find the recipe here:  http://missyscakesandaprons.blogspot.com/2011/08/peanut-butter-icing.html )  It really needed more powdered sugar, but I had also run out of thot not sugar.  This is why I need plenty of warning when people ask me to bake cakes.  My husband and I only have one car and he works 30 minutes away.  We have to go to either Ft Worth or Arlington to get palm sugar and my husband hates driving that far after working all day.
I used my Stand up Wilton bear pan.  Isn't he cute?  You can find the baking and decorating directions at Wilton.com .  I cut off his ears and trimmed his legs.  Then I covered the 8 inch leftover cake with frosting.
I did not have any sugar left to make white buttercream so I was not able to make any extra decorations.  I would have loved for the monkey to be holding a baby bottle or something, oh well!
I did put some frosting inside the bear before I put the middle of the cake from the heating element back inside to give the monkey more frosting.
I made a tail, ears, and legs from rice krispie treats.  The tail did fall down, but still looked okay. 
I started off with one toothpick, but next ended up adding more toothpicks later when they started to fall.  So I would put 1 toothpick on each end, and then after sticking them in the cake, add a toothpick from the front and one from the back where they "crisscross", this will help them to stay put.  I knew I was cutting the cake and could pull out all the toothpicks.  These are the ears!  Be sure to put the ears on the side of his face to look like a monkey.
I then added the legs.  I used a tip 16 and made stars all over the monkey.  When I made the belly, inside the ears, and face the frosting did not firm up enough for me to smooth over with my finger like buttercream does.  I had used a tip 12 to put the "light colored" frosting on.  Oh well, I ended up using my tiny spatula to smooth it the best I could.
Here is his backside, I was told the tail looked like a turkey neck when I pulled it off!  LOL
The funniest part of the cake was when I started cutting it.  I had put a dowel rod down the middle of the cake and another smaller one in his belly to keep him upright and from sliding.  I first cut off his head to lay on the side and start cutting.  Of course all the little girls were standing around me, watching.  When I did this the dowel rod was sticking out of his neck and one of the little girls from my Sunday School class said "His skeleton is sticking out!"  So I looked at her and said "of course he has a skeleton, he would fall over if he didn't have something holding him up just like you do!"  :)
The frosting was soft and held up pretty good in the 110° weather we have been having, but his hip fell off so I grabbed a couple of bananas and put them on the sides to hide it.  I later stuck a strawberry in front of his foot where it started to fall.  Everyone thought it was just part of his decorations!  LOL
Have a great day ya'll!
Missy

Tuesday, May 10, 2011

Penguin Beach Cake Tute part 2

Isn't he cute?  I borrowed a surf board from my neighbor girl's littlest pet shop as a pattern for my surfboard.  It was easier to make him laying down then standing on the surf board.
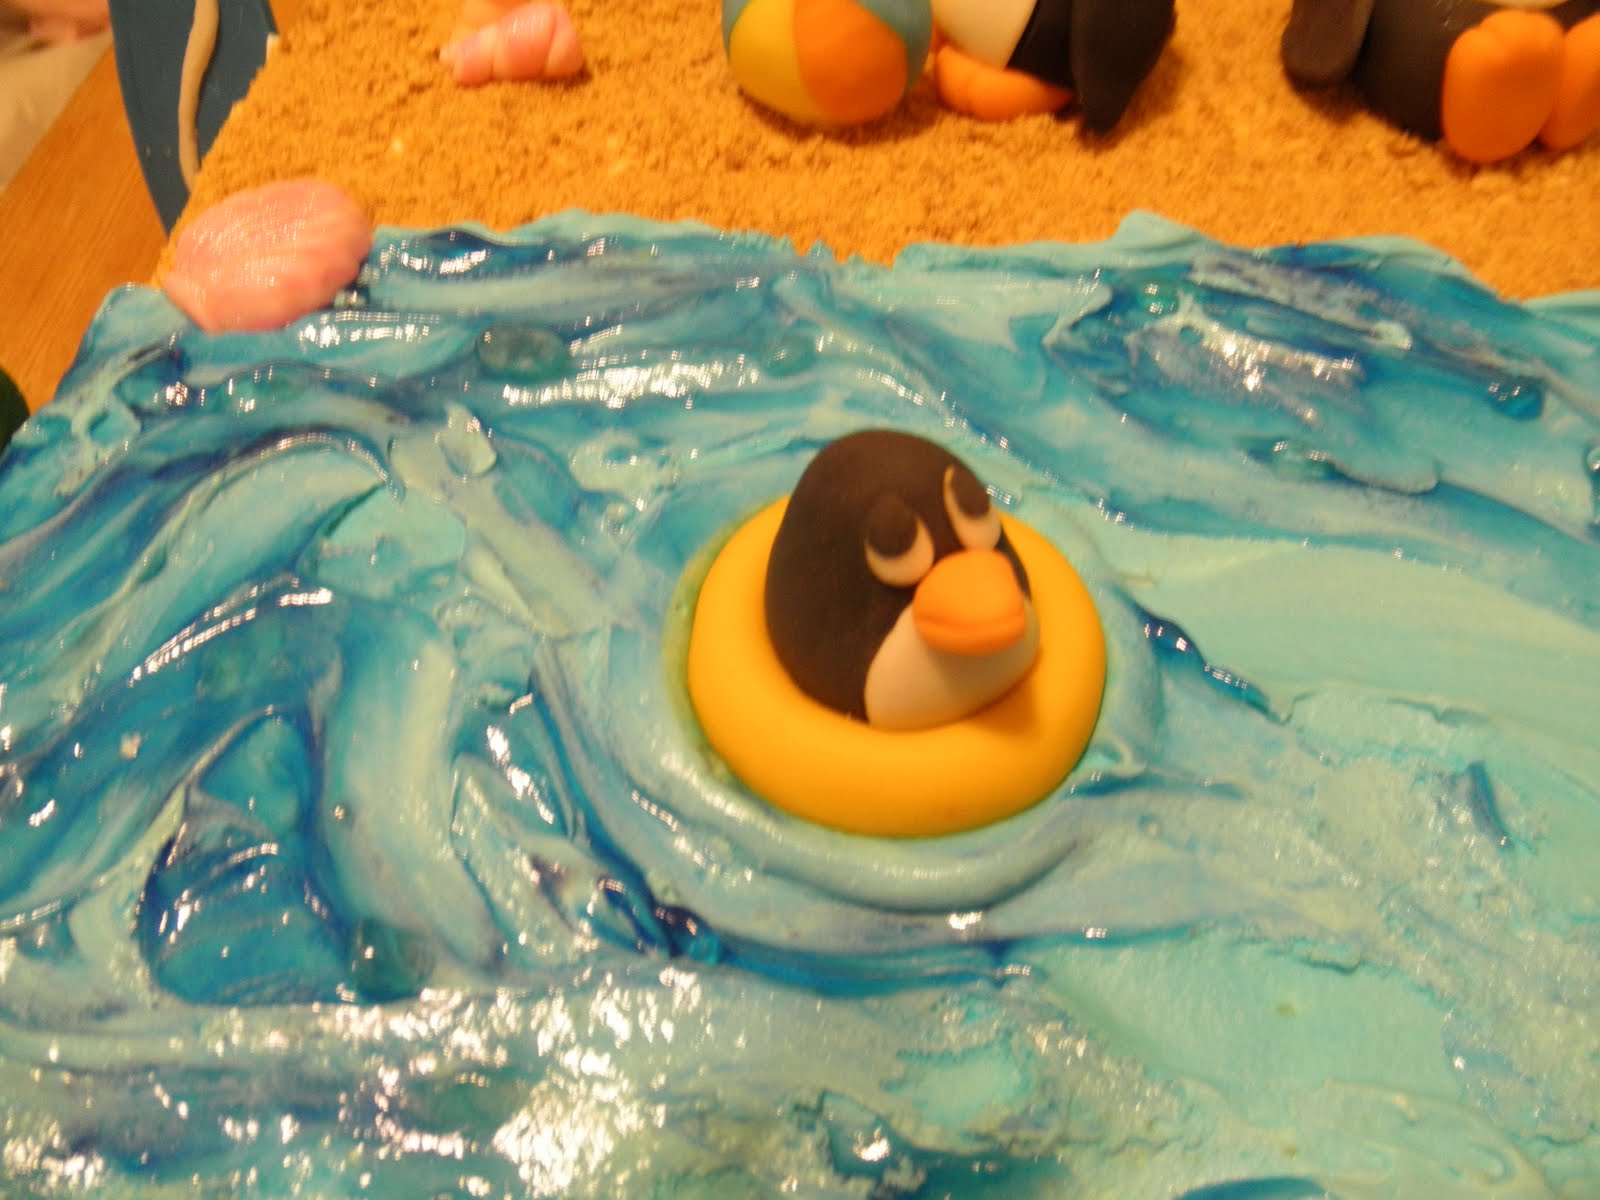
My little swimmer was originally supposed to have a duck floaty, but my husband said it did not look like a duck head, so I tore it's head off!  LOL
To make the water is pretty simple.  It works better with buttercream, but I had used royal icing which dries pretty quick.  I scooped some buttercream into a separate bowl and add the light blue food dye.  Don't mix it all the way in so it is swirly.  Cover the section where the water will be thinly with white icing.  Take the blue and "plop" mounds all over the white.  Take your spatula and swirl it all around, having a tiny bit of white swirlies is good.  Use dark blue in the piping gel and swirl it over the water, but do not completely cover the water.  See the different colors in the water?  It dried very sticky on top of the royal icing and some of my "sand" fell in it at the show and I could not get it out.  :(
I made the sand out of crushed cinnamon graham crackers.  I think next time I need to make my royal icing thinner to hold the sand better.  I'm also thinking a shaker to pour out the sand would be better then using my hands.
 I used red dusting powder to make the daddy penguin's sunburn.  I just brushed it on dry with a paint brush.


I loved it when I saw the episode on cake boss when he made the coral out of isomalt.  I could not find any info. on how to make it and I had never worked with isomalt before.  I searched the web on how to cook it and came up with a lot of conflicting info.  I know I cooked mine wrong because it clouded up up, but I think it looked good on the coral that way!  LOL


You can do this with any kind of sugar, whether it be cane sugar, palm sugar or isomalt.  Isomalt is a type of sugar that is easier to work with.  Be careful when working with hot sugar, it is one of the worst burns you can get!  If you do burn yourself, do not pull the sugar off - run it under cold water to disintegrate it.   Give yourself plenty of time to work.  After the isomalt was ready I poured into a Pyrex measuring cup and colored it.  Next time I will have separate pots and leave it in the pot simmering while I color each color.

I put different size ice cubes in a bowl, I'm thinking of trying the ice from Sonic next time. I'll still use different sizes though.   I put the orange on one side of the bowl and the pink on the other side of the bowl.  I kept checking periodically and pouring out the water as the ice melted.  When the isomalt was cool (It will be smooth on top and look nothing like coral yet) I dumped it upside down on a paper plate and let it dry.  The bottom part is what looks like the coral, after it drys just break it into whatever sizes you want.

If anyone has any hints on working with isomalt, I would love to hear it!

For part one of this tutorial, go here: http://missyscakesandaprons.blogspot.com/2011/05/penguins-at-beach-cake.html

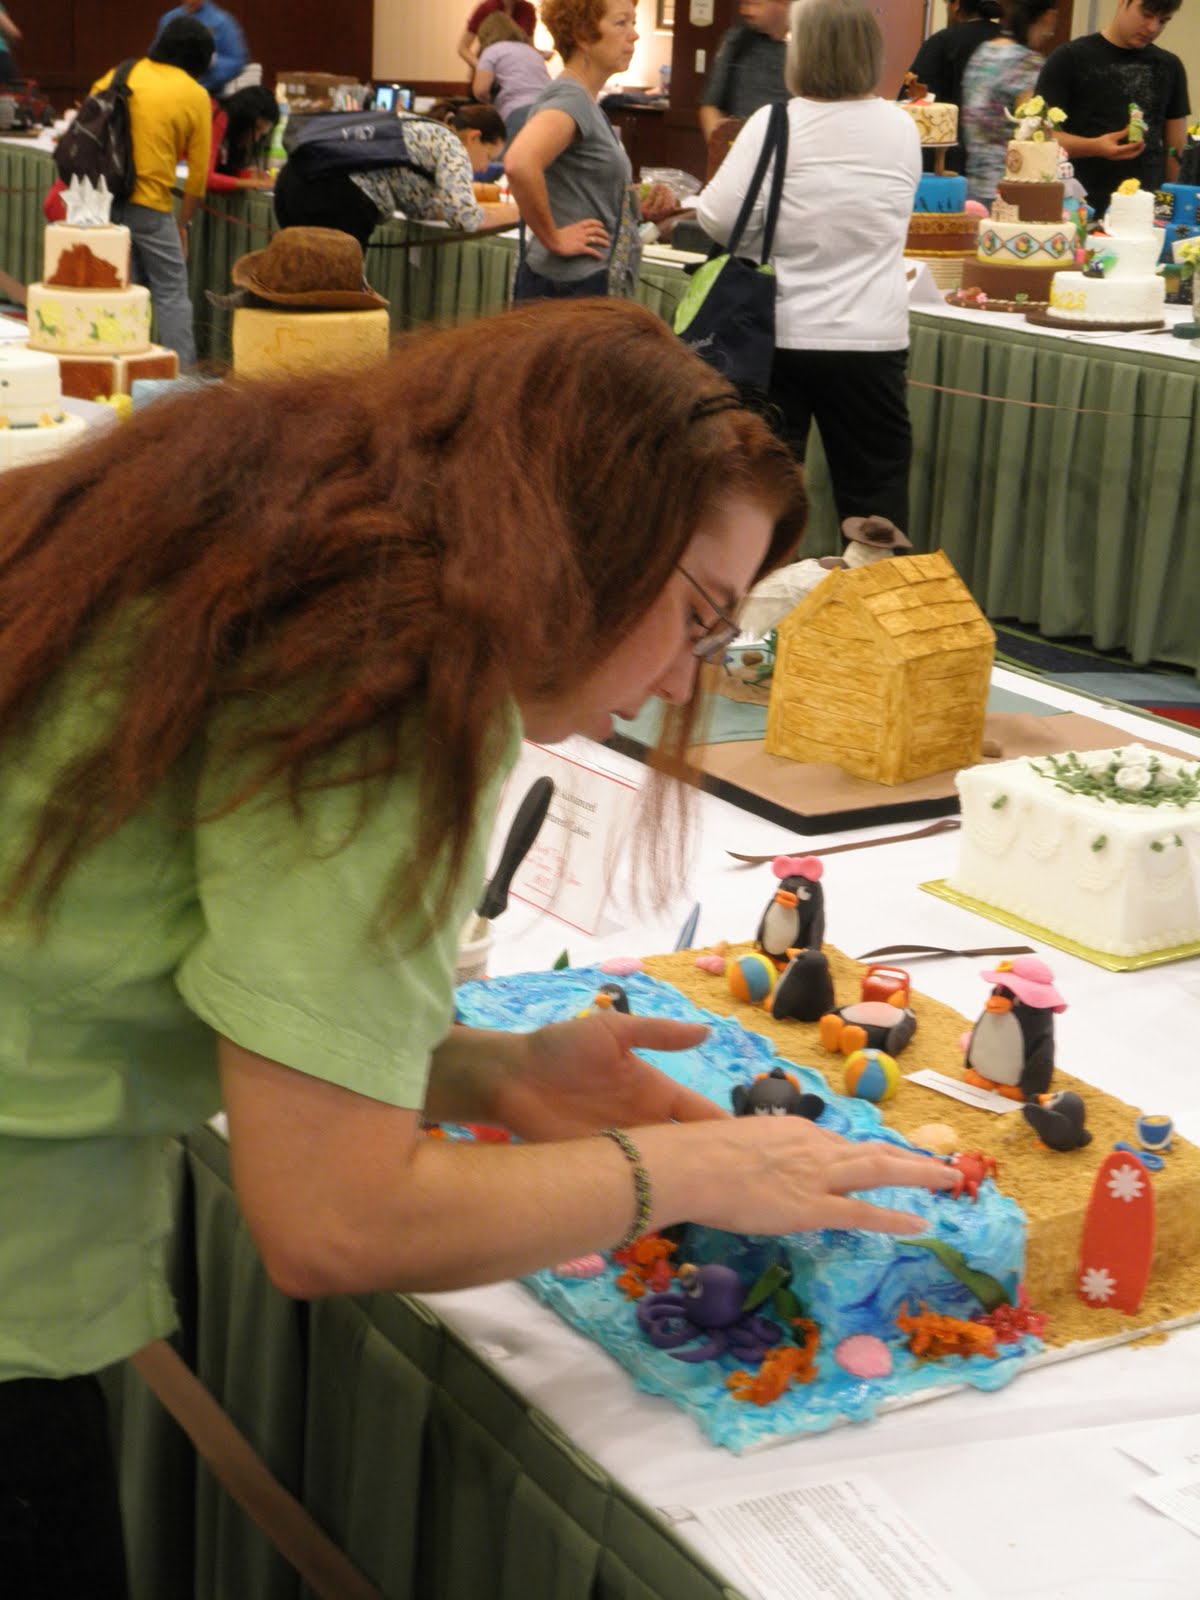
Here are some pictures my husband took of me getting my cake ready for the show.
Now you know what the cake shows look like when everyone is scrambling to get their cakes together before the show opens!
Thank you for joining me!
Missy

Friday, May 6, 2011
Penguins at the Beach Cake

I finally found out how to download the pictures from my phone, and this is a much better picture of my cake.  One of my facebook friends asked me if it tasted as good as it looked, I informed him that I didn't think he would want to eat it since it was made out Styrofoam!  I bought my Styrofoam at Hobby Lobby, it was too expensive to order a real cake dummy.  The cake dummies were cheap but the shipping for them was outrageous!  My cheap Styrofoam worked just as well!  Don't forget your Hobby Lobby coupon though!


My poor Mommy penguin broke, here is before the car ride and after the car ride.  Her wings were all nice and spread out, and then she fell off during the car ride and her wings were flattened and cracked.
I did not take many pictures during the decorating process, it was too late at night and I was in a hurry!  But I did take some. 


This cute little guy was the first I made, and he turned out very cute!  I made the feet first, and put toothpicks in the feet and added water to make the body stick to the toothpick.  It made the penguins off-centered so I had to add a toothpick to the back underside of the penguin to keep him upright.   Next I made an egg shape but after a while, she shrunk and wrinkled, so I ended up having to make the body out of rice krispies treats on my girls.


I dried some wings up against the sponge to give them a "flip" .  I wanted the baby's wings sticking out since he was playing in the sand so I put him up against the sides of the tray I was making him on and let the wings "rest" on the lip of the tray until they were dried.


 I love my crabs! I made the feet and let them dry in "u" shapes and then picked the ones that were closest in size to put on the

crabs.  After the legs dried I attached them with water.


I found a tutorial for making the beach ball here: http://sugarteachers.blogspot.com/2010/06/lifes-beach.html?utm_source=feedburner&utm_medium=feed&utm_campaign=Feed%3A+-sharingAndCaring-CakeDecoratingAndSugarArtTutorials+%28%7ESugar+Teachers%7E+-Cake+Decorating+and+Sugar+Art+Tutorials%29
Except, I free handed the sections of color and did not leave a spot white - I felt that looked unfinished. 
 
 
I used one of my flat fondant tools to make the marks in the turtle.  I pretty much free-handed the rest of him.


I loved my octopus.  I stuck the end of a paintbrush into the head to make the mouth.  I made the body first, then the legs.  I stuck the legs on underneath.


    I also made a little bucket and shovel that I filled with royal icing and then "sand". 
I ran out of time and did not cover the edge of the board with a ribbon.  Both judges docked me ten points each for that.  I also did not put anything on the back, which I had planned on but had to redo some of my penguins so did not have time to make anymore items.  I will definitely plan better next time!
 
  This is a pretty long post, so I'll let you know in the next post how to make the coral, shells, sand and water.
 
 
 Be sure to click here to learn more about the cake show I entered!
http://missyscakesandaprons.blogspot.com/2011/05/north-tx-cake-show-pictures.html

"Oh taste and see that the Lord is good: blessed is the man that trusteth in Him." Psalm 34:8