
.


First, measure your phone, then add one and half inches to two inches (see my measurements below). The first one I only added a half inch for 1/4 inch seams, but I forgot that I would have two sets of seams, one when I sewed the two pieces together and another one when I sewed the folded part to form the case.
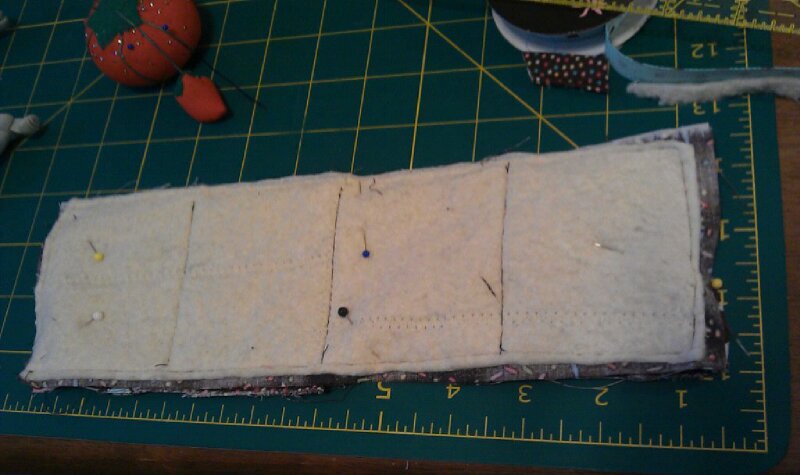
First thing I did was take the strips of batting I had leftover from the quilt and zig-zag stitched them together, side by side to avoid lumps. I just hate to waste material!


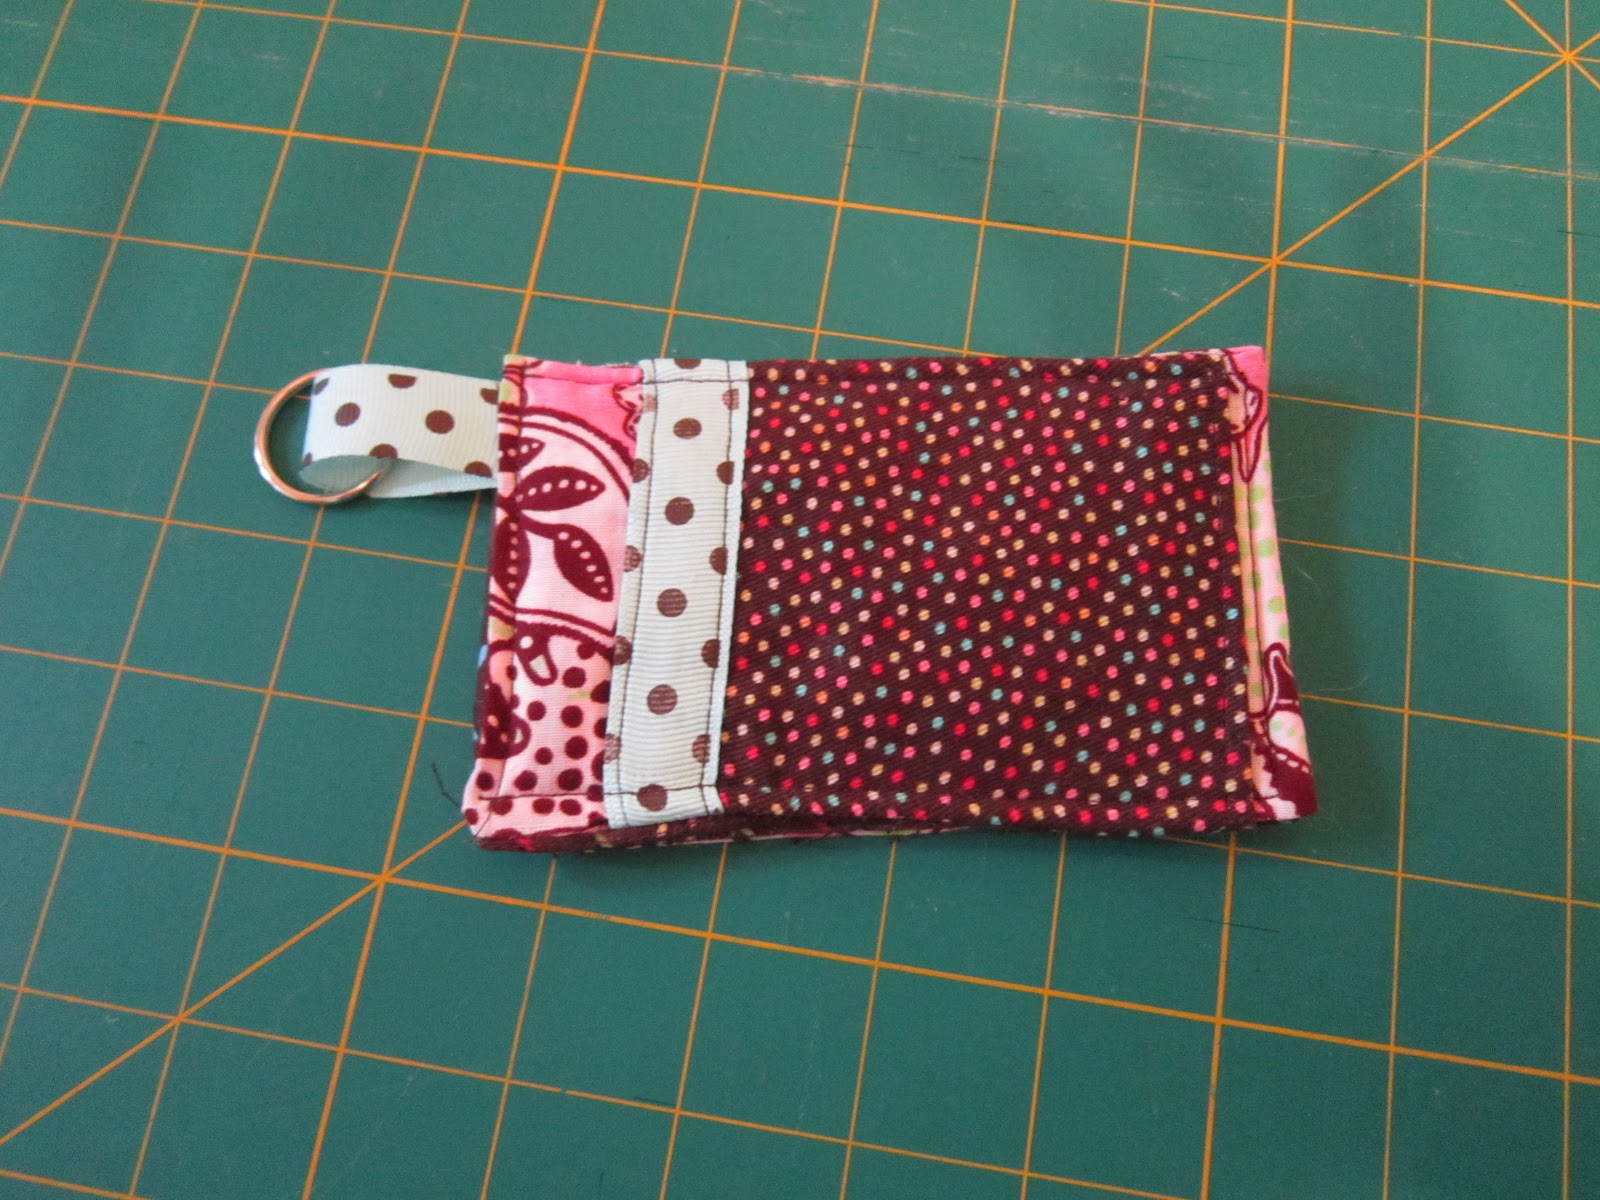
I am going to give you directions on how to make the case with a flap. My case measures 4 inches by 7 1/4 inches. My phone measures 3 inches by 5 inches today but when I measured it before I came up with 3 1/2 5 1/2 inches, I used a school ruler then and a tape measure today. I thought I had added 1 1/2 inches, but I guess I added two inches. I have an Android HTC sense and my friend has an IPhone 3GS and it fits both of our phones. I cut two coordinating fabrics 15 inches (I added 4 inches for the flap) by 4 1/2 inches.
You then sew the batting onto the wrong side of the material that will be on the inside of your case.
My first case I added the pocket before I sewed the outside, pink and inside, brown together. It looks better but is trickier as you can see by my crooked pocket in the smaller one. You need to fold your case in half and determine where you want the pocket then sew the pocket onto the outside of the material, pink side.
Next we put the tab for the keychain ring on. Determine where you want it and tack it on, this is easier than trying to pin it. Make sure the tab is next to the right side of the material facing in. Also attach the wristlet in the same way and pin the wristlet down to insure that you don't accidently sew it. I'll give you directions for the strap later. The tab is just a piece of ribbon folded in half about two inches long.

For the flap, I drew a circle to make the flap end rounded.


I sewed where the tab was connected a couple of times to re-enforce it, it will get lots of tugging. Turn it right side out. Next sew across the top to close the hole, I left the straight side open for the turning since it would be covered by the flap.


I folded the case back the way I want it to be when I sew it and pinned it half way up to leave room to sew on the velcro. As you can tell I already sewed the velcro on, it doesn't matter if you do the velcro or pocket first. You can leave the pocket off if you want, I just like the way it looks and can stick my drivers license in it if I go walking. I decided where I wanted it to go on both sides of the case and marked one side heavily then pressed down to see where the mark landed on the other side. Does that make sense? I used the glue stick to tack down the velcro until I sewed it on. You can't really see it in the picture I'm afraid. I used velcro instead of a button or snap because I wanted to be able to get to my phone quickly. Sew your velcro on with a pink thread that mtaches the outside of the case, I used a light color knowing I would be covering it with a yo-yo. I used black once and it looked awful.


After sewing on my pocket and velcro I sewed about a 1/4 inch, using the inside of my foot as a guide to sew around the entire pocket. Across the bottom up the side around the flap and back down again. You want a small seam, it looks better.


Update: Last night I took the small case and seam ripped it apart and re-sewed it together. It is now a little bigger and looks a lot better!
Have a great weekend ya'll, let me know if you have any questions!
Missy
17 comments:
so cute! great job, Missy! Rhonda
How cute! I'm like you, I always use every little bit of my batting that way!
Aahh...my sister would love this!! Thanks for sharing. :)
I would love for you to follow my blog and share this (and more) at my "Flaunt It Friday" Link Party @ www.dottedlinecrafts.blogspot.com
Your newest follower,
Sarah@
www.dottedlinecrafts.blogspot.com
Congratulations to you Missy. It's too cute! Thank you for sharing and for the link to the tutorial. I'll certainly need that help. Have a great day!
Awesome job! I would love for you to link up at my linky party via: http://ourdelightfulhome.blogspot.com/2012/03/show-me-what-you-got-linky-party-5.html
PS: I am your newest Linky Follower!
Mrs. Delightful
www.ourdelightfulhome.blogspot.com
I love your cute cupcake cell phone cover. I've made a little orange and pink owl quilted cell phone cover for my Tracfone SVC phone for seniors and I carry it around my neck, just for emergency purposes. I really like this $15 little phone as the keys are and letters are bigger than the average phone so I don't have to strain my eyes or use reading glasses to see who's calling.
These are adorable!! Made even better, of course, by the use of scraps :-). Looking forward to making one (or three) of my own. Your tutorial looks so easy to follow, I can't wait to try it. Thanks for sharing this!
Great job! Whoop! Whoop!
Cute cases
Very cute, Missy! Thanks for sharing the tutorial, too! Whoop whoop!!
Love your colors...this won't be lost in the darkness of your purse!...er, my purse,
This is great! Love the fabric you used. What a cute idea. :-) Wonderful job. I would love it if you considered sharing this at my Linky Party this week: http://www.artistic31mama.com/2012/03/fabulous-fridays-3-linky-party-031612.html
Thanks for sharing the tutorial.
Very creative! How long did the holder take to make?
hey. amazing creativity. thanks for sharing such wonderful ideas.will be looking for some more posts.
Phone Cover
Totally practical and it looks great!!! An excellent idea to attach a key ring and also to have velcro for easy opening. I'm making a cushion at the moment and have used pieces of batting sewn together.
These are the cutest phone covers I have ever seen on internet.
Post a Comment