I am almost done with my "flowers" on my hexagon quilt. I have 17 done and three more to sew. They are cut out, I have also cut out a lot of the navy that will be the "sashing" between the flowers, I'm just not sure how much I will need yet.
I wish I had known I had the purple material from the beginning, I would have made it the first row on all of the flowers, then different colors on the outside row. I learned this is not a true Grandmother's flower garden since it should have a third row of hexies, but for this quilt I don't feel like doing that.
I think the Lord knew I was going to need something to do with my hands later in the week. The week my daddy passed away, I felt an urge to hurry and get all of my flowers cut out, 1/4 inch seams marked, and coordinated into the flowers I wanted to sew together. When I found out my daddy died, I grabbed my stitching to take with me to AR the next day. I know my step brother and step sister, but we do not have a relationship since we did not live together, and my daddy had Christmas with them on Christmas Eve and me on Christmas Day, etc. My half sister I have only seen a handful of times in the past 30 years, she is 13 years older than me and had moved away by the time my parents were divorced. I am close to my step mother though. While everyone was sitting around talking, I sat there doing my hand stitching. Everyone was family and my half sister had her daughter and grandchildren. It helped to keep my nerves calm and gave my hands something to do. All of the children were like "are you sewing?" with big expressions of wonder on their faces. Everybody wanted to see the wall hanging I had made Marge for Christmas last year too. I do not think I could have survived last week without my stitching. The Lord knew I was going to need something for my hands to do. Thank you to everyone who was praying for me, I really appreciate it.
If you want to see the quilt I made Marge, you can go here to see it:
http://missyscakesandaprons.blogspot.com/2011/12/i-finally-finished-my-first-official.html
Happy Quilting!
Missy
"She looketh well to the ways of her household, and eateth not the bread of idleness." Proverbs 31:27
Monday, June 11, 2012
Saturday, June 9, 2012
Summer Ruffle Purse
I have been seeing these ruffle purses around for for a couple of years, even have a pattern for one. I look at tutorials and patterns, then do my own thing(because I have trouble reading patterns). I have been wanting to make one, but just never did. One thing I really wanted was a pocket on the outside for a bottle of water. I live in TX and it gets pretty hot, so I like to have my water handy. I needed to figure out a way to put a pocket on the side without the ruffles being in the way. This was not easy to do, I still messed up, but this is what I ended up doing. I also wanted a draw string for the top since I will be traveling this summer, I didn't want a pick pocket!
I made 8 ruffles, four for each side. You can choose 1, 2 or 4 different fabrics. I wanted to use these fabrics below. I was not sure how I wanted to arrange them, but thought the pink and yellow gingham would be a lot of fun with the fruity material. (I only used material from my stash, and since I bought the fruity material on clearance a couple of years ago and the rest was given to me, I'm sure it cost me under $5 to make). I remembered I had the green linen and thought it would make a good base and lining for the purse.
I cut the base of the bag and lining 15 1/2 inches by 24 inches. I really should have cut the lining 15 inches by 23 1/2 inches for a better fit. I used heavy interfacing cut the same size as the outside of the bag. I used pieces that I had and sewed them together, the interfacing will give shape and stability to the bag. I basted it onto the outside of the bag, around the edges. It will be sewed on better when the ruffles are sewn on.
Here comes the tricky part, it took me a whole day to figure out the side pocket for my water bottle. How to put a pocket on the side and not mess up the ruffles? I thought if I put a flap on each side of the seam I could sew the ruffles straight across the pocket and then sew the pockets together.
Here are the pocket flaps when the bag is opened up. I made the flaps 6 1/2 x 8 in. I cut two pieces and sewed them two inches from the side and 1/2 inch up from the bottom. I actually only need one flap, I had to cut one off at the end because I messed up, and it was two big. That's okay I sewed the other flap on the other side and made a pocket for my prescription sunglasses. It would be easiest to make the width of the bag half the size and sew the sides of the pockets together before sewing the sides of the bag together, or you can make one flap for each side.
I highly recommend drawing lines across the bag to make sure your ruffles are straight and evenly set a part. I started measuring at two inches from the bottom of the pocket. I set my lines every two inches. Go ahead and iron down the top of the bag, this will give you a smooth finish at the top of your bag. I ironed them down about the width of my forefinger, I guess around 1/4 inch to 1/2 inch.
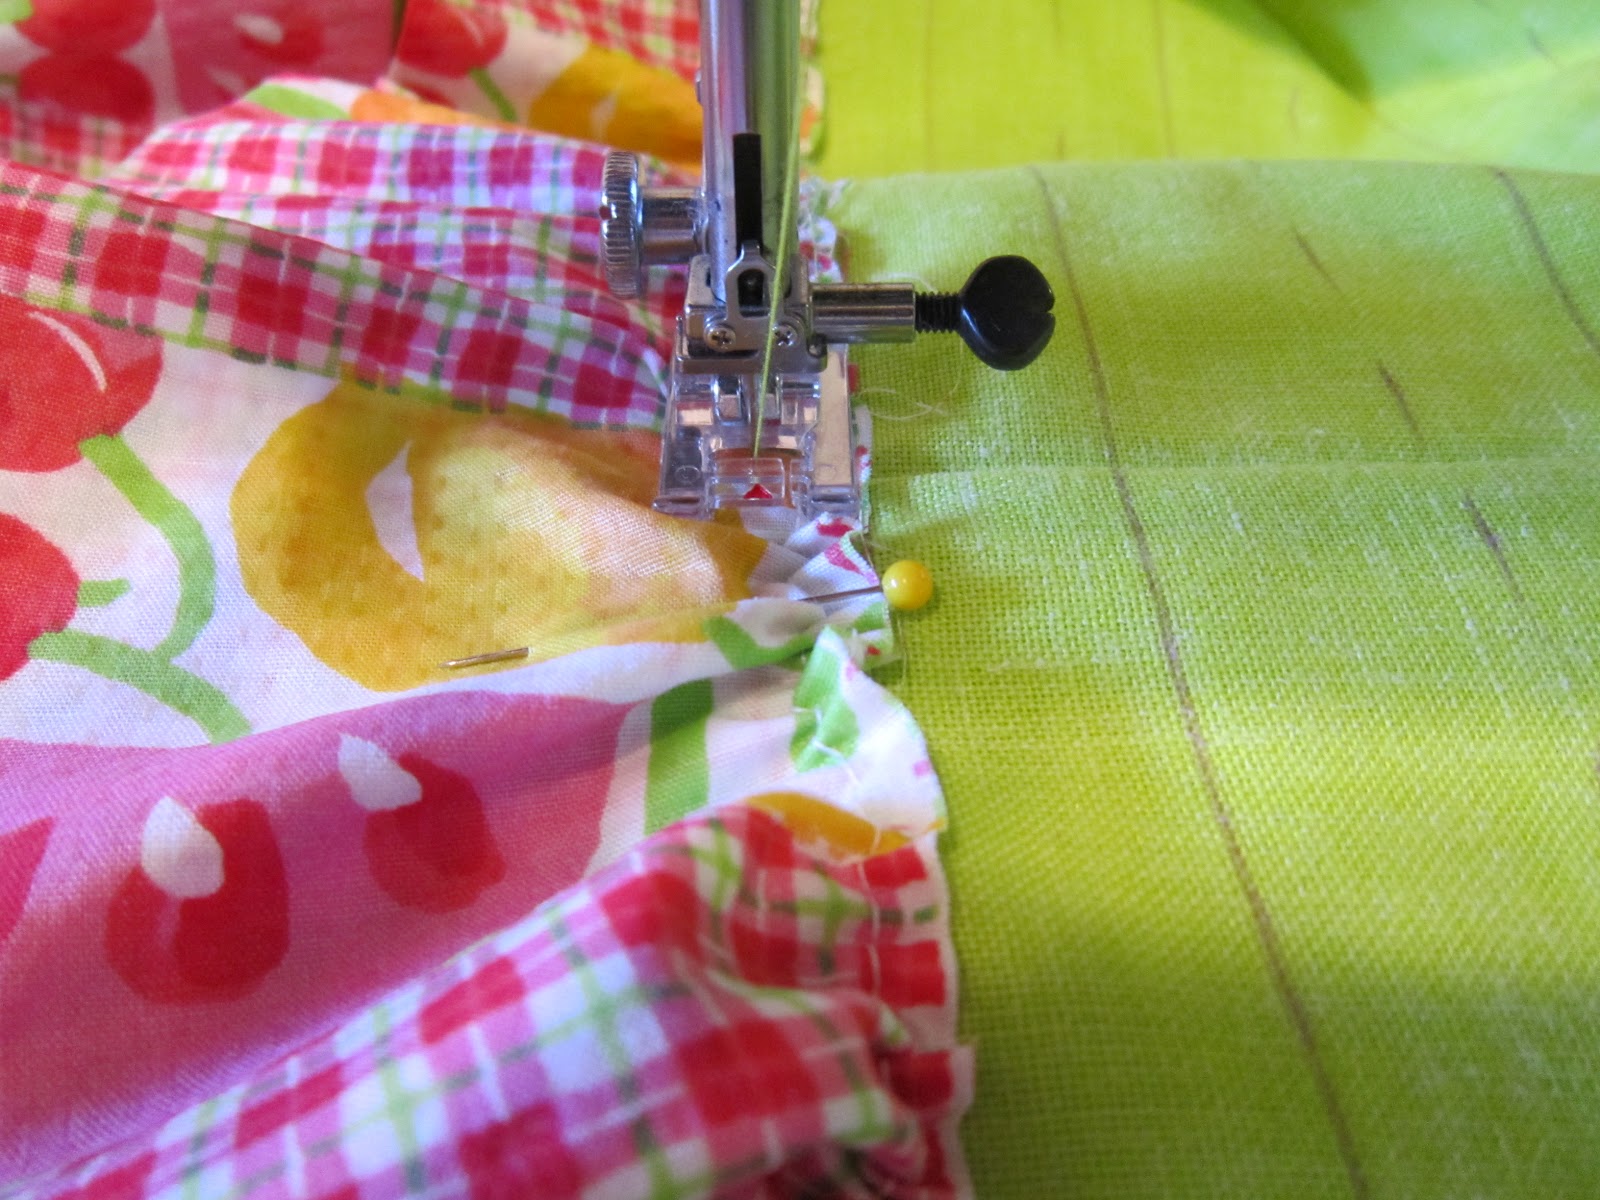
I opened the bag and pinned on the ruffles starting at the bottom on each side. You can see how I sewed across the flap and not onto the part under where the pocket will be. Remember to sew one flap on each side of the bag instead of the way I did both on the same side(unless you cut your flaps in half), this will give you two pockets, one on each side of the bag of the bag.
After folding my ruffles they were three inches wide and had about a 1/4 inch seam when sewn on.
I sewed the last ruffle at the top of the pocket, make sure you end with the ruffle that is made from the tube.
To make the casing for the drawstring is pretty easy. I cut the pink gingham 15 inches by 4 inches and sewed them right sides together. After turning the casing right side out, I folded the ends in and sewed them together. I then just sewed the top and bottom of the casing leaving the ends opened. The casing ended up being about 13 1/2 inches long. You want room on the sides to sew the bag together and allow room for the ties. Make sure you have a couple of inches at the top to allow room for gathering the ties. I wish I had allowed my top to be a little bigger.
Here is the inside of the bag after sewing everything on. You don't have to worry about the interfacing moving!
Here are the pockets with the ruffles sewn on.
This was my mistake, I sewed the pocket the next day and totally messed it up. If you are sewing the two flaps, do not sew the bottom of the pocket. This is what the sides of the bag will look like before sewing together.
The correct thing to do next, (with one flap instead of two), go ahead and sew the sides of the bag together on both sides, keeping the flaps out of the way. (can you see where I had sewn the two flaps of the pocket together first?)
Pin the bottom ruffles out of the way also. I pinned my ruffles down before sewing the sides of the bag right sides together. I'm not much of a pinner but I did pin the bag because there are so many varibales to watch while sewing. (the ruffles, pocket and top of the bag lining up). It wasn't perfect, but worked.
Next, I wanted to "box" the bottom of my purse. I took the edge and flattened it, making sure the ruffles were not in the way. I went up about an inch and sewed straight across. This gave me a box look on the bottom of my purse.
To make the pocket is kind of hard the way I did it. I cut one of the flaps off since it was so big and sewed it onto the other side of the bag. I sewed the pocket down as for as my sewing machine would go and finished up by hand sewing along the bottom and the part of the side my machine would not reach, If the bag had two pieces instead of one I could have left the bottom to sew last and would have been able to sew the entire pocket without any problems. This was a learning experience for me!
I like lots of pockets! I had cut two pieces of gingham to make pockets going across the entire length of the the lining. I also basted interfacing onto these pockets since they were so flimsy. I cut them 15 1/2 inches by 7 1/2 inches. I measured three inches from the top of the bag and two inches from the bottom of the bag to determine where to put the pockets and how tall to make them.
Before sewing the long pocket on I added smaller pockets. I had leftovers, so the pockets were not really measured. I sewed a pocket onto teach long pocket. I made the pocket below to0 close to the edge and sewed up a lot of it when sewing the bag together.
Next I worked on the ties for the handle and the drawstring. I took three pieces of the fabric and braided them together. I just pinned it to my skirt like I did with friendship bracelets when I was a teenager. For the draw string I knotted one end and then ran it through the casing and knotted the other end. For the handle I did not knot (Okay, I laughed when I typed that!) the ends because it is easier to sew without the knots. Be sure to sew across the braids before threading through the casing or sewing on the bag.
I cut 3 strips of fabric about 37 inches long and three inches wide. I realized for the handle that it was not wide enough, so the second handle I cut the strips wider, the wider the strips the bigger the handle (I highly recommend cutting them 4-6 inches wide for the handles), I made two handles for stability, but sewed them next to each other as if they are one handle instead. I like the look. You can see what I'm talking about in the bottom picture.
I sewed the lining together right sides together, (which is correct) but turned it wrong side out (which is not correct, as you can see in the picture) so I thought I made a mistake, ripped the seams out, sewed it together wrong, only to realize I did it right the first time, ripped my seams out and resewed it! LOL Don't forget to box the seams of the lining also.
You are now ready to sew the handles on and sew the lining to the bag. I put one braid on each side of the seam (I did not put them on the seam to reduce bulkiness). Make sure the braids are not twisted.
I pinned all the way around and then sewed it together!
Stick your water bottle in your pocket and you are done!
I have plenty of room for my hand sewing also! http://missyscakesandaprons.blogspot.com/2012/05/color-question-and-traveling-kit.html
I love the fact that I can either leave the bag open to stick more stuff in, or close it with the draw string to make it smaller. It is perfect for my vacation and all my summer activities!
How to make a ruffle: http://missyscakesandaprons.blogspot.com/2010/08/how-to-make-ruffle.html
Why I suggest the lines for the ruffles, they were crooked on my ruffle dress for my niece: http://missyscakesandaprons.blogspot.com/2012/03/easy-ruffle-dress.html
How to make casings: http://missyscakesandaprons.blogspot.com/2011/06/easy-casings.html
For more purse ideas, visit my pinterest board! http://pinterest.com/missyshay/purses-bags-and-wallets/ If you need an invite to pinterest let me know!
I hope this tutorial made sense, if you have any questions or suggestions please share! It took me a week to figure out how to make this purse, but I couldn't be happier with it!
Missy
I made 8 ruffles, four for each side. You can choose 1, 2 or 4 different fabrics. I wanted to use these fabrics below. I was not sure how I wanted to arrange them, but thought the pink and yellow gingham would be a lot of fun with the fruity material. (I only used material from my stash, and since I bought the fruity material on clearance a couple of years ago and the rest was given to me, I'm sure it cost me under $5 to make). I remembered I had the green linen and thought it would make a good base and lining for the purse.
After I started cutting the fruity material, I realized that when I folded it in half I had two different patterns, the cherries and the fruit, so I decided to just use the same material for all the ruffles. I cut the ruffles 6 inches by 30 inches, which was the width of my fabric.
I could have used my ruffle foot to make the ruffles, but I wanted them to look a little more random. In a couple of photos above you can see on the top two ruffles I made them in a tube (casing)and turned them wrong side out so the top and bottom would have finished edges, the other size ruffles were just folded in half since the top of them would not be seen.I cut the base of the bag and lining 15 1/2 inches by 24 inches. I really should have cut the lining 15 inches by 23 1/2 inches for a better fit. I used heavy interfacing cut the same size as the outside of the bag. I used pieces that I had and sewed them together, the interfacing will give shape and stability to the bag. I basted it onto the outside of the bag, around the edges. It will be sewed on better when the ruffles are sewn on.
Here comes the tricky part, it took me a whole day to figure out the side pocket for my water bottle. How to put a pocket on the side and not mess up the ruffles? I thought if I put a flap on each side of the seam I could sew the ruffles straight across the pocket and then sew the pockets together.
Here are the pocket flaps when the bag is opened up. I made the flaps 6 1/2 x 8 in. I cut two pieces and sewed them two inches from the side and 1/2 inch up from the bottom. I actually only need one flap, I had to cut one off at the end because I messed up, and it was two big. That's okay I sewed the other flap on the other side and made a pocket for my prescription sunglasses. It would be easiest to make the width of the bag half the size and sew the sides of the pockets together before sewing the sides of the bag together, or you can make one flap for each side.
I highly recommend drawing lines across the bag to make sure your ruffles are straight and evenly set a part. I started measuring at two inches from the bottom of the pocket. I set my lines every two inches. Go ahead and iron down the top of the bag, this will give you a smooth finish at the top of your bag. I ironed them down about the width of my forefinger, I guess around 1/4 inch to 1/2 inch.
I opened the bag and pinned on the ruffles starting at the bottom on each side. You can see how I sewed across the flap and not onto the part under where the pocket will be. Remember to sew one flap on each side of the bag instead of the way I did both on the same side(unless you cut your flaps in half), this will give you two pockets, one on each side of the bag of the bag.
After folding my ruffles they were three inches wide and had about a 1/4 inch seam when sewn on.
I sewed the last ruffle at the top of the pocket, make sure you end with the ruffle that is made from the tube.
To make the casing for the drawstring is pretty easy. I cut the pink gingham 15 inches by 4 inches and sewed them right sides together. After turning the casing right side out, I folded the ends in and sewed them together. I then just sewed the top and bottom of the casing leaving the ends opened. The casing ended up being about 13 1/2 inches long. You want room on the sides to sew the bag together and allow room for the ties. Make sure you have a couple of inches at the top to allow room for gathering the ties. I wish I had allowed my top to be a little bigger.
Here is the inside of the bag after sewing everything on. You don't have to worry about the interfacing moving!
Here are the pockets with the ruffles sewn on.
This was my mistake, I sewed the pocket the next day and totally messed it up. If you are sewing the two flaps, do not sew the bottom of the pocket. This is what the sides of the bag will look like before sewing together.
The correct thing to do next, (with one flap instead of two), go ahead and sew the sides of the bag together on both sides, keeping the flaps out of the way. (can you see where I had sewn the two flaps of the pocket together first?)
Pin the bottom ruffles out of the way also. I pinned my ruffles down before sewing the sides of the bag right sides together. I'm not much of a pinner but I did pin the bag because there are so many varibales to watch while sewing. (the ruffles, pocket and top of the bag lining up). It wasn't perfect, but worked.
Next, I wanted to "box" the bottom of my purse. I took the edge and flattened it, making sure the ruffles were not in the way. I went up about an inch and sewed straight across. This gave me a box look on the bottom of my purse.
I like lots of pockets! I had cut two pieces of gingham to make pockets going across the entire length of the the lining. I also basted interfacing onto these pockets since they were so flimsy. I cut them 15 1/2 inches by 7 1/2 inches. I measured three inches from the top of the bag and two inches from the bottom of the bag to determine where to put the pockets and how tall to make them.
Before sewing the long pocket on I added smaller pockets. I had leftovers, so the pockets were not really measured. I sewed a pocket onto teach long pocket. I made the pocket below to0 close to the edge and sewed up a lot of it when sewing the bag together.
I had these three pieces leftover from an apron I had made and sewed the tops down to finish them, then zig-zag stitched around them instead of folding them under and stitching. It's not like anyone would see them.
When I sewed the long pockets on, I turned them upside down and laid them across the line that was two inches up from the bottom and sewed across it.
I forgot to take a picture, but then I sewed about three lines up the pockets to make more pockets. I left one pocket pretty wide on the yellow gingham where the pink paisley pocket is. I am going to add a flap here, so make sure you do that now if you want a big pocket. The pocket flops open too much.
Can you believe all of the pockets? 14 inside and two outside!Next I worked on the ties for the handle and the drawstring. I took three pieces of the fabric and braided them together. I just pinned it to my skirt like I did with friendship bracelets when I was a teenager. For the draw string I knotted one end and then ran it through the casing and knotted the other end. For the handle I did not knot (Okay, I laughed when I typed that!) the ends because it is easier to sew without the knots. Be sure to sew across the braids before threading through the casing or sewing on the bag.
I cut 3 strips of fabric about 37 inches long and three inches wide. I realized for the handle that it was not wide enough, so the second handle I cut the strips wider, the wider the strips the bigger the handle (I highly recommend cutting them 4-6 inches wide for the handles), I made two handles for stability, but sewed them next to each other as if they are one handle instead. I like the look. You can see what I'm talking about in the bottom picture.
I sewed the lining together right sides together, (which is correct) but turned it wrong side out (which is not correct, as you can see in the picture) so I thought I made a mistake, ripped the seams out, sewed it together wrong, only to realize I did it right the first time, ripped my seams out and resewed it! LOL Don't forget to box the seams of the lining also.
You are now ready to sew the handles on and sew the lining to the bag. I put one braid on each side of the seam (I did not put them on the seam to reduce bulkiness). Make sure the braids are not twisted.
I pinned all the way around and then sewed it together!
Stick your water bottle in your pocket and you are done!
I have plenty of room for my hand sewing also! http://missyscakesandaprons.blogspot.com/2012/05/color-question-and-traveling-kit.html
I love the fact that I can either leave the bag open to stick more stuff in, or close it with the draw string to make it smaller. It is perfect for my vacation and all my summer activities!
How to make a ruffle: http://missyscakesandaprons.blogspot.com/2010/08/how-to-make-ruffle.html
Why I suggest the lines for the ruffles, they were crooked on my ruffle dress for my niece: http://missyscakesandaprons.blogspot.com/2012/03/easy-ruffle-dress.html
How to make casings: http://missyscakesandaprons.blogspot.com/2011/06/easy-casings.html
For more purse ideas, visit my pinterest board! http://pinterest.com/missyshay/purses-bags-and-wallets/ If you need an invite to pinterest let me know!
I hope this tutorial made sense, if you have any questions or suggestions please share! It took me a week to figure out how to make this purse, but I couldn't be happier with it!
Missy
Friday, June 8, 2012
Nanny's Quilts
As many of you know, my dad passed away last week. My stepmother had four quilts that my grandmother made. When she passed away 20 years ago I was 18 and I got her jewelry box. So when Marge told me she had a quilt from Nanny I was really excited. I had to laugh because she told Marge to give one to me, one to my sister and one to my step brother when we were responsible adults. I guess I'm a responsible adult now at 38- LOL. Just kidding, I'm sure they got tucked away and forgotten.
One of my fondest memories of my grandmother was going to quilting bees with her at church when I was little. My job was to crawl under the quilting loom and they would thread the yarn through and hand me the needle (under the quilt) and I would push the needle back up to her or one of the other ladies. I guess I got the quilting bug from her! She always had a huge fabric stash sitting next to her sewing machine.
I already had one quilt she had made me when I was a little girl. It is a scrap quilt and is falling apart now because I have used it so much! I've slowly been trying to repair it. I think it is funny to look at the "70s" material used in it.
Do you have any idea how hard it was to choose a quilt for me and a quilt for my sister? My sister was not able to make it to my daddy's funeral. There were two matching quilts and two hexagon quilts. I decided from the beginning to pick the same quilt for my sister that I picked for myself.
Here is the first quilt. Can anyone tell me the name of the pattern?
I love the pink trimmed scalloped borders. I was going to pick these two quilts since they were identical and I love the pattern and borders. I can see my Nanny making these two quilts with my sister and I in mind. But Marge, my step mom, said that there were no names applied to the quilts and to choose whichever one I wanted. She was always making us matching clothes. Here is the other one. Is it weird to say that I feel a connection to these quilts? I just love them and miss them already! Here is information on this quilt! It is a circle upon circle quilt, or glorified nine patch.
I keep second guessing myself and thinking I should have picked these, I love them!
But....I kept being drawn to the hexagons! They are so tiny, I'm guessing one inch! hey were all hand quilted, I know the hexies were hand pieced for sure. The first is a Grandmother's Flower Garden (I'm making one now with 3 inch hexies). At first I was going to pick this one because I love the green sashing!
Look how she finished the edges, she did a "whipstitch?" around it. I think she might have used English paper piecing for the hexies, I'm not sure. I love the hexie border though!
She "stitched in the ditch" when she quilted it, I love the materials she used on it. I won't be seeing my sister for six weeks, so until then I am displaying it and enjoying it on my quilt rack. I am going to give this one to my sister, I think she will really like it. I also have my scrappy quilt that Nanny made me on it. That was a practical quilt.
I decided to keep the diamond set hexies. Can you see the background pattern of the prism cubes?
I just think this "modern" (LOL) pattern is awesome! I do not know how old these quilts are, they would have to be over 20 years old since that was when she passed away, but I don't when she made them. Here is a closer view, there is also a star pattern if you look at it differently.
Do you see the white flower in the middle where the diamonds connect?
I love all of the scrappy materials she used in all of the hexies, especially the ginghams and that purple calico and the pink butterflies from above.
Here is it's new home, it's not a real quilt rack, but it serves the purpose!
It looks like she cut the hexies on this one and added a white border and then the binding on this one. Or she might have made half hexies and sewn them in since the bottom of the diamonds on the edge have white hexies? I think I like this one the best because it is nice and soft as if it has been used and the other one feels new.
Here is a picture of my Nanny. My quilt is the most special thing I got because not only is it something to remember my daddy by but something to remember Nanny by also. She was German, Genevieve Williams, her friends called her Janey.
Thank you for letting me share my quilts and memories with you!
Happy quilting!
Missy
One of my fondest memories of my grandmother was going to quilting bees with her at church when I was little. My job was to crawl under the quilting loom and they would thread the yarn through and hand me the needle (under the quilt) and I would push the needle back up to her or one of the other ladies. I guess I got the quilting bug from her! She always had a huge fabric stash sitting next to her sewing machine.
I already had one quilt she had made me when I was a little girl. It is a scrap quilt and is falling apart now because I have used it so much! I've slowly been trying to repair it. I think it is funny to look at the "70s" material used in it.
Do you have any idea how hard it was to choose a quilt for me and a quilt for my sister? My sister was not able to make it to my daddy's funeral. There were two matching quilts and two hexagon quilts. I decided from the beginning to pick the same quilt for my sister that I picked for myself.
Here is the first quilt. Can anyone tell me the name of the pattern?
I love the pink trimmed scalloped borders. I was going to pick these two quilts since they were identical and I love the pattern and borders. I can see my Nanny making these two quilts with my sister and I in mind. But Marge, my step mom, said that there were no names applied to the quilts and to choose whichever one I wanted. She was always making us matching clothes. Here is the other one. Is it weird to say that I feel a connection to these quilts? I just love them and miss them already! Here is information on this quilt! It is a circle upon circle quilt, or glorified nine patch.
I keep second guessing myself and thinking I should have picked these, I love them!
But....I kept being drawn to the hexagons! They are so tiny, I'm guessing one inch! hey were all hand quilted, I know the hexies were hand pieced for sure. The first is a Grandmother's Flower Garden (I'm making one now with 3 inch hexies). At first I was going to pick this one because I love the green sashing!
Look how she finished the edges, she did a "whipstitch?" around it. I think she might have used English paper piecing for the hexies, I'm not sure. I love the hexie border though!
She "stitched in the ditch" when she quilted it, I love the materials she used on it. I won't be seeing my sister for six weeks, so until then I am displaying it and enjoying it on my quilt rack. I am going to give this one to my sister, I think she will really like it. I also have my scrappy quilt that Nanny made me on it. That was a practical quilt.
I decided to keep the diamond set hexies. Can you see the background pattern of the prism cubes?
I just think this "modern" (LOL) pattern is awesome! I do not know how old these quilts are, they would have to be over 20 years old since that was when she passed away, but I don't when she made them. Here is a closer view, there is also a star pattern if you look at it differently.
Do you see the white flower in the middle where the diamonds connect?
I love all of the scrappy materials she used in all of the hexies, especially the ginghams and that purple calico and the pink butterflies from above.
Here is it's new home, it's not a real quilt rack, but it serves the purpose!
It looks like she cut the hexies on this one and added a white border and then the binding on this one. Or she might have made half hexies and sewn them in since the bottom of the diamonds on the edge have white hexies? I think I like this one the best because it is nice and soft as if it has been used and the other one feels new.
Here is a picture of my Nanny. My quilt is the most special thing I got because not only is it something to remember my daddy by but something to remember Nanny by also. She was German, Genevieve Williams, her friends called her Janey.
Thank you for letting me share my quilts and memories with you!
Happy quilting!
Missy
Monday, June 4, 2012
Book Review, The River Rose, and a giveaway!
I have to tell you about this great book that I just read! I was sent this book to review and I am so glad! I have read a lot of Gilbert Morris's books, but The River Rose was one of the best! It is the second book in the Water Wheel series, but it is a stand alone book. I have not read the first book, The River Queen, yet, but I am going to remedy that quickly!
The The River Rose is about a man and woman who do not know each other, and they inherit equal shares in a paddle wheel boat. They have to decide if they want to keep the boat and work it or sell it and split the proceeds.
Jeanne Bettencourt, a young Christian widow, has not had an easy time raising her daughter on her own. She was raised on a steamer, so the Helena Rose is a God-send for her.
Clint Hardin, a single prizefighter/machinist, has inherited the other part of the steamer. He does not know anything about boats but wants to run the steamer. He is a known ladies man, and Jeanne is wary of all men.
Gilbert Morris does a great weaving these two opposite's lives together to become a successful team. He has a surprise ending. It is a great book so be sure to read it!
Here is a video interview with Gilbert Morris about the book: http://youtu.be/kuNkvCqhPTM
I have a link to the first chapter of the book, so please be sure to read it for yourself!
Here are a few of his interview questions about the book:
How do you do your historical research?
I think it can be easy to do too much research, just as it can be a
mistake to do too little. Some writers are so anxious the give the historical
background, that they forget the story. My own problem is to do a good job with
research and with the story.
How do you manage to keep
your dialogue true to the time period without allowing it to sound stilted?
Reading a great
deal of Dickens, for example, will carry over into the writer’s work. There is
a danger that all of a writer’s characters will sound alike, which makes for bad fiction. I always try to find some
characteristic that will set a character apart, perhaps bad grammar or a
pronounced regional accent.
Your novels have a number of female
characters with red hair and green eyes. Is that based on a real person?
Got lots of red hair in my family, so I
always like redheads! No green eyes. I just get tired of trying, in a book with
forty characters, to give them eyes that differ. Blue, brown, green. What other
colors can eyes be?
I did say of one shady character, “He had
eyes the color of spit.” Now, really, that character had to be evil!
What fascinates you most about
1850s Mississippi?
It was a dramatic time
in American history. The Civil War, the rise of modern transportation, the
beginning of our industrial growth.
How did you decide to set your
story on a steamer?
When I was a boy, I
lived for a time in Helena, Arkansas. The river then was still thick with the
sternwheelers, and I would sit for hours on the bank of the river and watch
them, and riding on one was a thrill.
How can readers find you on the Internet?
My website and
blog are at http://www.gilbertmorris.com
Subscribe to my blog’s feed: http://feeds.feedburner.com/GilbertMorris
Sign up for my
e-newsletter (for subscriber-only giveaways and advance notice of my upcoming
novels): http://gilbertmorris.com/news.htm
Facebook page: facebook.com/gilbertmorrisbooks
Pinterest: http://pinterest.com/gilbertmorris/
Twitter: @gilbert_morris - https://twitter.com/#!/gilbert_morris
Now for the giveaway, would you like to win your own book? It's easy! Just leave me a comment letting me know what you would name a steamer if you owned one? For a second entry, follow Gilbert Morris's blog, and let me know in a separate comment. I will leave the giveaway open for one week, June 11 I will draw the winner!
I hope you enjoy this book as much as I did!
Missy
I received a complimentary copy of this book for review from B&H Publishing Group. I was not required to write a positive review. The opinions I have expressed are my own. I am disclosing this in accordance with the Federal Trade Commission's 16 CFR, Part 255.
Subscribe to:
Posts (Atom)
"Oh taste and see that the Lord is good: blessed is the man that trusteth in Him." Psalm 34:8